


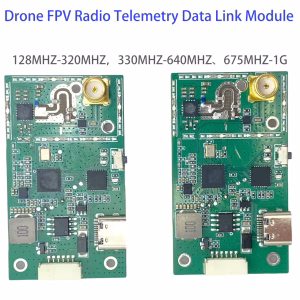

Drone FPV Radio Telemetry Data Link frequency customized

It is suitable to develop a drone data transmission module with a different frequency. The unique personal customized frequencies can avoid the busy Microhard data transmission range 902~928Mhz
Table of Contents
Introduction
This is a newly launched digital transmission module, which is a small module with strong anti-interference ability. The device uses digitized signals through source coding and channel coding, transmits through digital channels, or stores them through digital storage and recording devices.

Advantage
- Strong digital communication confidentiality
- Strong anti-interference ability
- Long transmission distance and good stability
- With relatively low transmission delay, real-time transmission can be achieved
- Can be directly connected and controlled through mobile phones or tablets, easy to install and use
Specification
| Transmitter frequency range | 128MHZ-1G (Frequency can be customized) |
| Receiver frequency range | 128MHZ-1G (Frequency can be customized) |
| Operating frequency band | 128MHZ-320MHZ,330MHZ-640MHZ、675MHZ-1G |
| power | 1-3W |
| Input source | Serial port, SUBS |
| power consumption | 4W |
Definition of serial port


Indicator light description
Blue Light: Send Light After the connection is successful, the blue indicator light is always on, indicating that the data is being sent
Green Light: After the connection is successful, the green indicator light is always on, indicating that the data is being received
Red Light: The power-on indicator stays on after the power-on
Note: The antenna must be installed before powering on, and then powered on

Product Installation Instructions
Installation Guide
- For the transmitter, install the antenna before powering it on, otherwise, it will cause circuit damage.
- Please ensure that the power supply voltage of the transmitter and receiver is within the specified voltage range, otherwise the circuit will be damaged.
- Try to make the transmitter antenna vertically upwards and obscure it by obstacles to avoid shortening the communication distance due to blocking.
- The antenna of the transmitter and receiver should be as far away as possible from the conductive parts.
- Be sure to use the specified model of the antenna to ensure that the frequency band, impedance, and other parameters match.
- Pay attention to keeping a suitable distance between the electronic equipment during installation, to minimize the electromagnetic interference between the equipment.
Usage Guidelines
- Please ensure that all cables are securely fastened and that the connections are correct.
- The power cord and serial port cable of the air terminal and the ground terminal are connected to the equipment
- 12V power supply
- Open the serial port tool page, identify the serial slogan, select the baud rate of 57600, and click to open
- After turning on, the red light and the blue light are on, indicating that the connection is successful
- After the connection is successful, the data can be sent
PCBA Layout

USB Driver
CP210x-Driver for Vcan2061.rar


Liam –
Enjoy the unrestricted freedom of flight, soaring without hindrance or impediment! I was able to save my drone missions in crowded urban areas by customizing the frequency at which they were conducted. Because there are no more signal clashes with other pilots, you’ll enjoy smooth telemetry data, even when operating in environments with a high density of radio frequencies.