


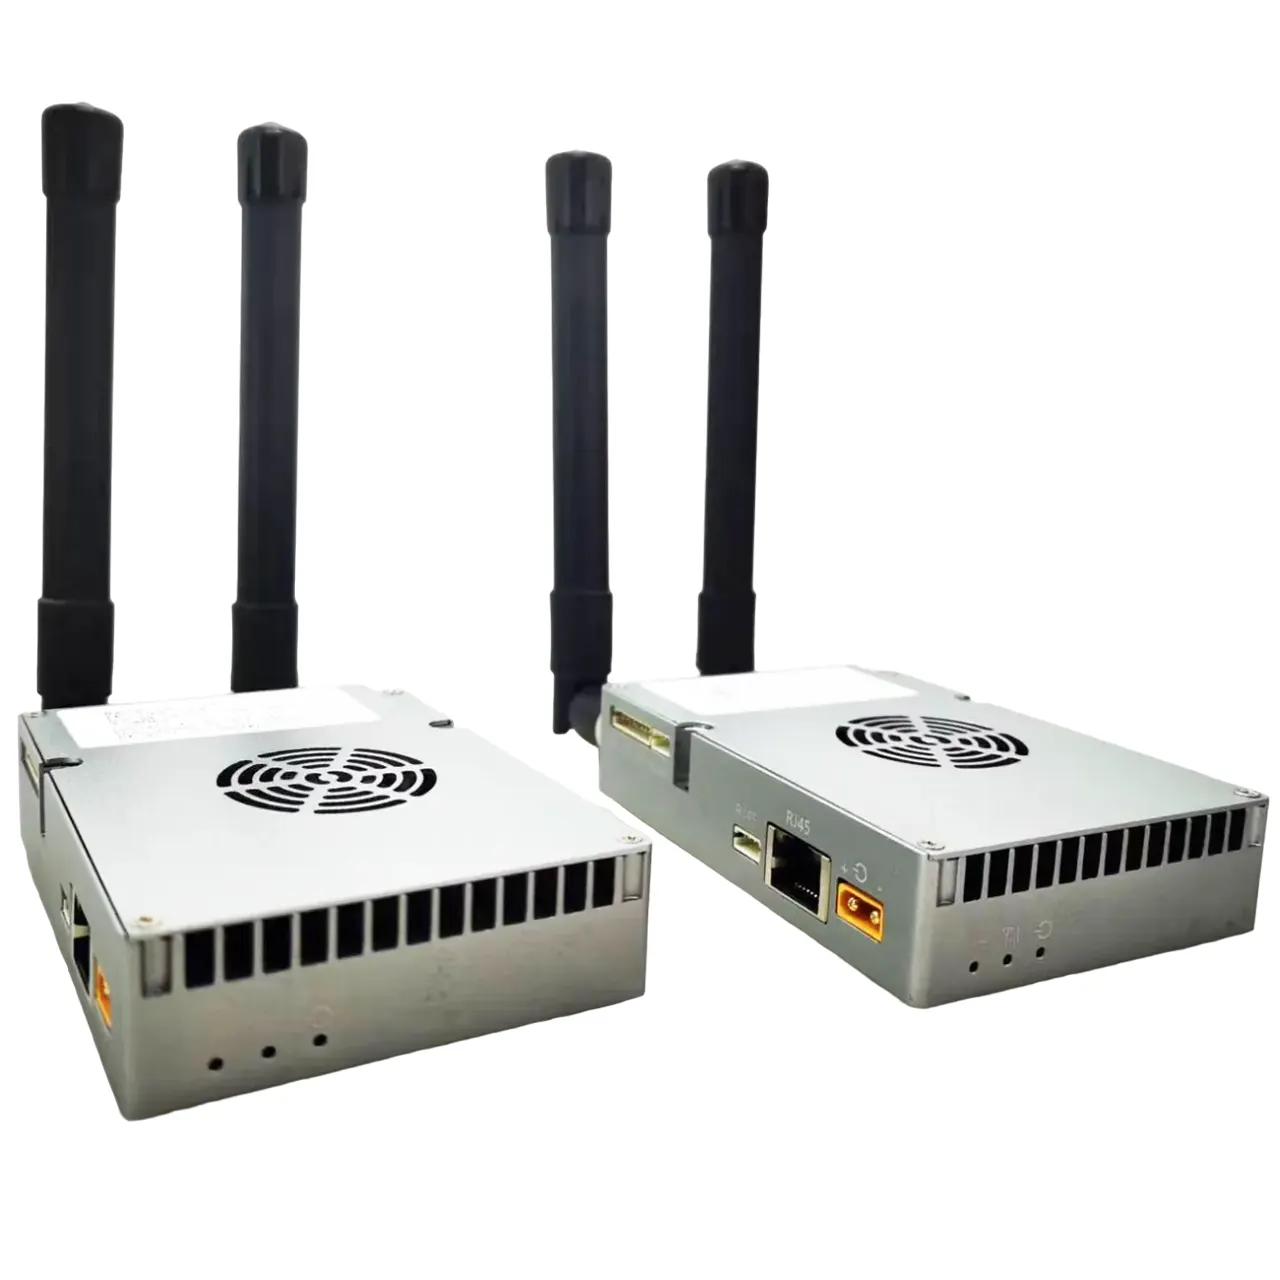


FHD Video Data RC Transmission System
Відмова від відповідальності
- Перед використанням уважно прочитайте посібник користувача. Обов’язково зверніть увагу на попередження та повністю зрозумійте всі пункти.
- Будь ласка, суворо дотримуйтесь місцевих правил управління радіочастотами.
- Будь ласка, дотримуйтеся кроків встановлення в посібнику, щоб використовувати цей продукт. Наша компанія та агент не несуть юридичної відповідальності за пошкодження обладнання чи персоналу, спричинені встановленням і модифікацією користувачами.
- This copyright of this manual belongs to VCAN Group Limited No one may make copies without written consent.
Обережно
Увага до монтажу
1. Перед увімкненням, переконайтеся, що підключення антени надійне . в іншому випадку, це призведе до пошкодження пристрою.
2. Переконайтеся, що напруга знаходиться в межах діапазону використання.
3. Будь ласка, зверніть увагу на ЕМС всього електронного обладнання на вашому безпілотнику.
4. Рекомендується встановлювати антену вниз і тримати антену подалі від металу на безпілотнику.
5. Обов’язково використовуйте відповідну антену.
Перед використанням
1. Переконайтесь, що всі кабелі підключені правильно та міцно.
2. Немає іноземних об'єктів (наприклад. рідина, пісок, і т.д.) може бути введений всередину пристрою.
3. Це вимагає 15 секунди для початку пристрою. Відео та дані не можуть бути передані, поки пристрій не закінчить завантаження.
4. Будь ласка, переконайтеся, що навколишнє середовище, в якому використовується обладнання, не містить інших електромагнітних перешкод.
5. Коли сигнал слабшає, Ви можете покращити ефект, змінивши напрямок заголовка антени.
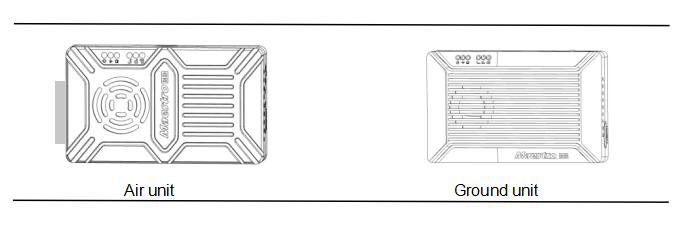
пакувальний лист
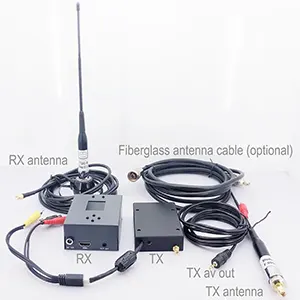
Modules
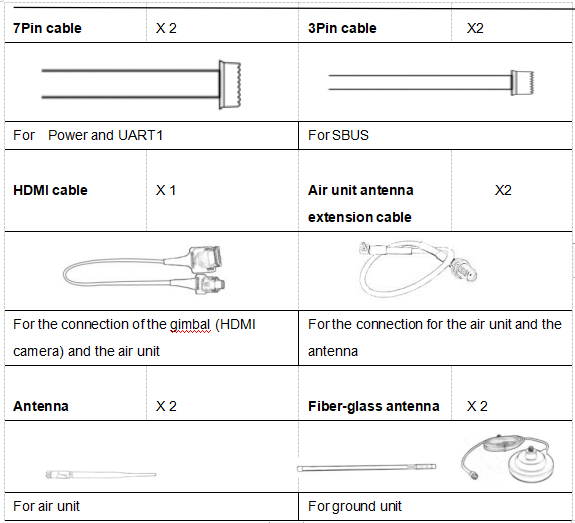
аксесуари
Огляд
М50&M51, призначений для дронів , is a kind of wireless FHD video and data transmission system. Він має переваги невеликих розмірів,low power consumption and long distance. Система може передавати FHD-відео, Дані управління польотом, дані контролю підвісу, і одночасно дані управління RC. За допомогою відеокодеку H.265 і технології модуляції OFDM, М50&M51 can achieve low latency, high resolution video transmission.
Завдяки передовій радіочастотній технології, М50&M51 can support three frequency bands. Користувачі можуть легко змінювати діапазони частот. Users can choose the suitable frequency band according to local regulations. The Chinese radio type approval ID is 2019DP8189(CMIIT ID:2019DP8189). Also you can choose frequency hopping or fixed mode under special conditions.
The air unit of M50&M51 system can be configured to Point-to-Point mode or Repeater mode. Users only need one more air unit and simple configuration to achieve long distance transmission. Будь ласка, перегляньте відео з інструкцією для отримання додаткової інформації.
М50&M51 has an encryption function. Користувачі можуть увімкнути / вимкнути цю функцію за потреби. It is easy to set encryption code using Maestro Assistant or Web UI.
The device has 2 UART—UART1 and UART2. Два протоколи, Mavlink і прозорий, підтримуються. Користувачі можуть використовувати його для передачі даних управління польотом та керування карданним валом. Also the system can improve the RC control distance via the SBUS port. On the ground unit of M50&M51, є USB 3.0 порт. User can add a USB storage device to save the FHD video.
М50&M51 support a variety of video input and output interface, наприклад, HDMI, Ethernet, SDI, CVBS . Він також може відповідати більшості карданних валів на ринку.
Model Description
M 5X H/S*:
M standing for Maestro series.
5X distance level code*.
H/S indication of air unit video interface.
*50 stands for 7km,51 stands for 17km,H stands for HDMI,S stands for SDI. Please tell us the right model when ordering.
напр.:M50H standing for 7km,air unit video interface is HDMI(both with HDMI and Ethernet)。
риси
Далека відстань модуляція
-Up to 17km @ LOS– OFDM
інтерфейс Відео інтерфейс даних
-HDMI/Ethernet/SDI/CVBS – UART(TTL/RS232)/SBUS,
Стрибкова/фіксована частота смуга частот
-Виправлено: визначений користувачем – 800МГц/1,4 ГГц/2,4 ГГц,
-Стрибковий: автоматичний Режим роботи
BW – Повітряний агрегат може бути :Режим «точка-точка».
-3/5/10/20 MHz Repeater mode
CODEC Швидкість передачі відео
– H.265 / H.264 – 500kbps~5Mbps
Робоча температура Діапазон потужності
– 40℃ ~ +70 ℃ – DC 9~28V акумулятор 3S~6S
M51 Interface Description
Повітряний агрегат
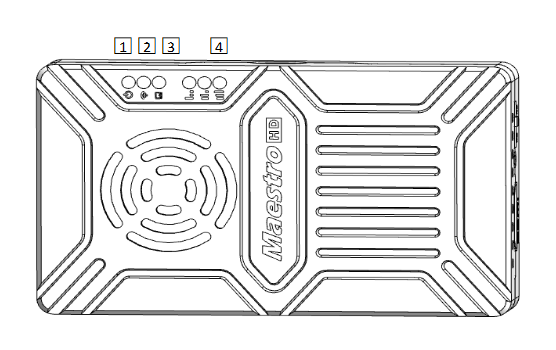
1. індикатор живлення
Цей індикатор є суцільним зеленим, коли повітряний блок завантажується.
When air unit has started, indicator light blinks once per second if there is no video source input to HDMI. And indicator light will be solid green if there is video source.
2. індикатор Link
| Опис світлодіодного шаблону |
| Встановлено суцільну зелену бездротову ланку |
| light off Wireless link is lost |
3. Індикатор стану
| Світлодіодний візерунок (моргнути лише в завантажуванні) Опис |
| Моргання 3 times Initialization OK, Frequency is 2.4GBlink 2 times Initialization OK, Частота - 1,4Gblink 1 time Initialization OK, Частота становить 800 м |
| solid green Air unit abnormal |
4. RSSI Indicator
| LED Pattern Description |
| 3 solid green Wireless signal is strongest |
| 2 solid green Wireless signal is medium |
| 1 solid green Wireless signal is weak |
| all LED turn off No wireless signal |
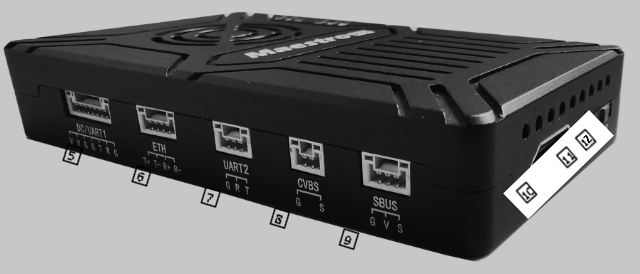
5. DC/UART1
| номер | характер | опис | Вхід/Вихід |
| 1,2 | V | +Vcc Power Input(9~28 В) | Я |
| 3,4,7 | G | GND | Я / О |
| 5 | T | TXD(from air unit to external) | O |
| 6 | R | RXD(from external to air unit) | Я |
6. Ethernet
| номер | характер | опис | Вхід/Вихід |
| 1 | T+ | TX+ | O |
| 2 | T- | Техас- | O |
| 3 | R+ | RX+ | Я |
| 4 | R- | RX- | Я |
7. UART2
| номер | характер | опис | Вхід/Вихід |
| 1 | G | GND | Я / О |
| 2 | R | RXD(from external to air unit) | Я |
| 3 | T | TXD(from air unit to external) | O |
8. CVBS video input interface
| номер | характер | опис | Вхід/Вихід |
| 1 | G | GND | Я / О |
| 2 | S | CVBS Video IN | Я |
9. SBUS out interface
| номер | характер | опис | Вхід/Вихід |
| 1 | G | GND | O |
| 2 | V | +5V Output(Imax 1A) | O |
| 3 | S | SBUS_OUT | O |
10. Type A HDMI video input interface
11. кнопка
Прес 10 секунд, air unit will restore all parameters to factory setting。
12. Mode switch
WB is wide band,using wide wireless frequency band.
NB is narrow band,using narrow band to multi-modules transmission.
Поради: WB mode is recommended,because this mode has better performance in point-to-point transmission.
Наземний блок
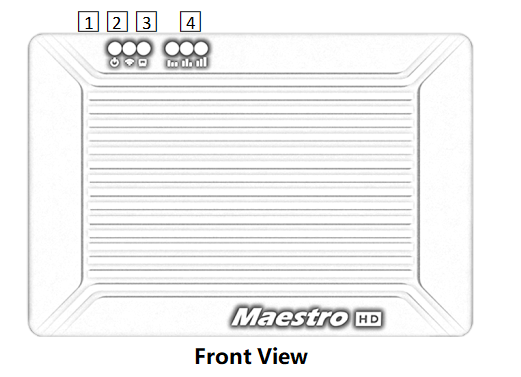
1. індикатор живлення
This indicator is solid green when ground unit is power on.
2. індикатор Link
| Опис світлодіодного шаблону |
| Встановлено суцільну зелену бездротову ланку |
| light off Wireless link is lost |
3. Status indicator
| Опис світлодіодного шаблону |
| Моргання 3 times Initialization OK, Frequency is 2.4GBlink 2 times Initialization OK, Частота - 1,4Gblink 1 time Initialization OK, Частота становить 800 м |
| solid green Ground unit abnormal |
4. RSSI Indicator
| Опис світлодіодного шаблону |
| 3 solid green Wireless signal is strongest |
| 2 solid green Wireless signal is medium |
| 1 solid green Wireless signal is weak |
| all LED turn off No wireless signal |
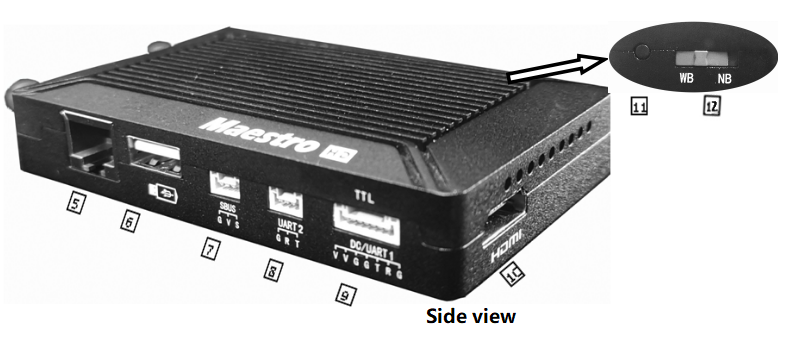
5. Ethernet port(RJ45)
Connecting to host computer. Support RTSP/TCP/UDP protocol.
6. USB port(Type A)
Connect to USB disk for video recording
7. SBUS input port
| номер | характер | опис | Вхід/Вихід |
| 1 | G | GND | O |
| 2 | V | +5V вихід | O |
| 3 | S | SBUS_IN | Я |
8. UART2
| номер | характер | опис | Вхід/Вихід |
| 1 | G | GND | Я / О |
| 2 | R | RXD(from external to ground unit) | Я |
| 3 | T | TXD(from ground unit to external) | O |
9. DC/UART1
| номер | характер | опис | Вхід/Вихід |
| 1,2 | V | +Vcc DC Input (9~28V) | Я |
| 3,4,7 | G | GND | Я / О |
| 5 | T | TXD(from ground unit to external) | O |
| 6 | R | RXD(from external to ground unit) | Я |
10. HDMI(Type A)
FHD video output port .
11. кнопка
Hold on for 3 seconds to start video recording and then hold 3 seconds to stop recording. You need to insert USB storage device first.
Hold on for 10 seconds, ground unit will restore all parameters to factory setting。
12. Mode switch
WB is wide band,using wide wireless frequency band.
NB is narrow band,using narrow band to multi-modules transmission.
The air and ground unit should be the same direction.
установка
Повітря
1. Installing the air unit on your drone
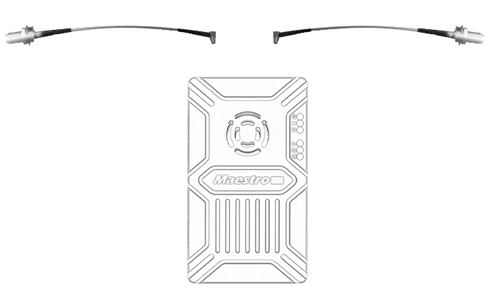
1.1 Insert the MMCX-to-SMA cable into the ports on the side of the air unit. When you hear a click, it means good connection.
1.2 Fixed the device and RF cable on your drone. Встановити антену. Pay attention to the connection of the antenna to tighten. Make the antenna downward. There is no metal or shielding within 20cm of the antenna.
2. Connect the camera (gimbal).
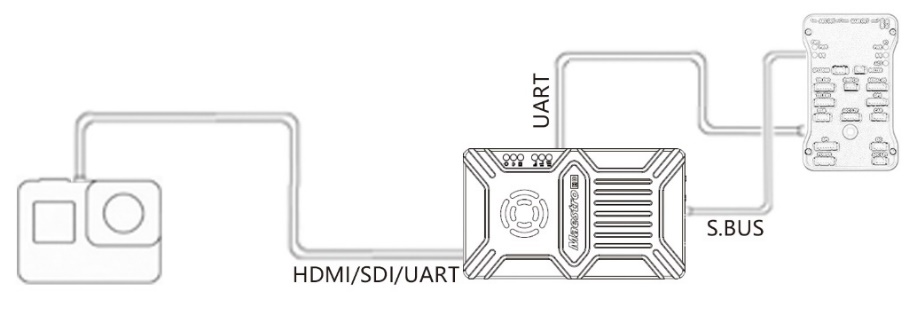
Connect the camera/gimbal to the air unit with HDMI/SDI/Ethernet cable. And connect UART1 and SBUS to the flight controller. Do not put the antenna near the motor or ESC, otherwise the device will be interfered.

Drawing of complete drone Installation
Земля
1. Connect the antenna
1.1 Connect the fiber glass antenna which was supplied along with the device to the ground unit. They have common port—SMA. Make sure to tighten the joint. The 2 fiber glass antenna should be 1.5m apart.

1.2 Connect the HDMI cable .
Connect the HDMI port with HDMI cable to a monitor. The FHD video signal will be displayed on the monitor directly.
2. Connect to the Ground Station
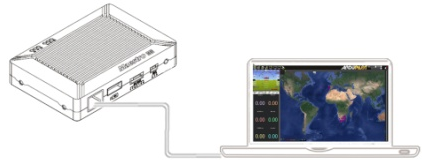
Ground station has two connection ways with M51 ground unit, to transmit video and data.
Get video
1. Via HDMI directly
If the Ground Station has a HDMI monitor, just connect the ground unit to the monitor directly via HDMI cable.
2. Via Ethernet
Connect the Ethernet port with CAT cable to computer or ground station. User can use third-party software to decode, such as VLC, Планувальник місії.
If you connect an IP camera to the air unit of M51, the ground unit can also output FHD video to monitor directly via HDMI. Please watch the video tutorial and other parts of this document.
Get data
1.You can get data from ground unit via UART1 and UART2. Maybe you need a UART to USB converter.
2. You can get data from Ethernet port using UDP/TCP protocol.
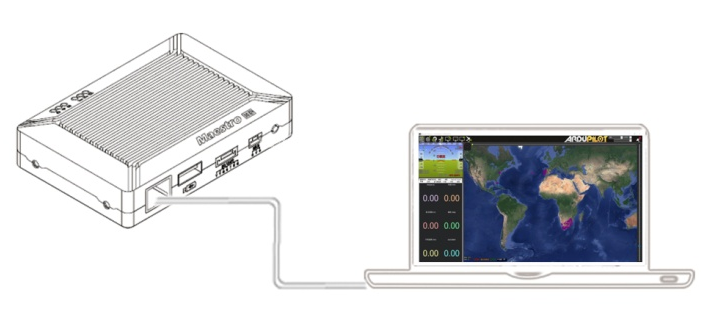
Drawing of connection on ground
M51 Інструкція
Quick start
1. Preparing
Make sure all the connections are ready, including the antenna, HDMI cable and so on.
2. Сило
The DC voltage is 9~28V. After power on, the POWER LED will be solid green.
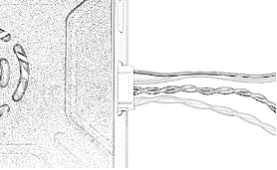
Будь-яке питання, please refer to the FAQ. Це вимагає 15 секунд для запуску. After the system starts, the wireless transmission can be established. Video transmission will take 15 more seconds.
M51 with Mission Planner
Follow the steps to use M51 with Mission Planner:
1. Connect the UART1 of M51 air unit to flight controller, such as Pixhawk. Connect the gimbal to the M51 ETH or HDMI.
2. Make sure all the air and ground cable connection is finished. Power on the system.
3. Install Mission Planner to your computer.
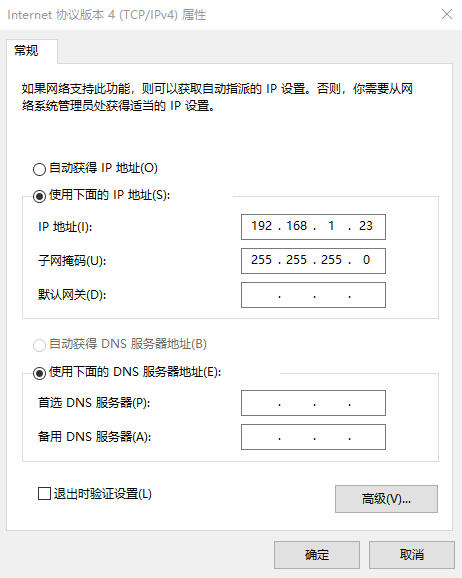
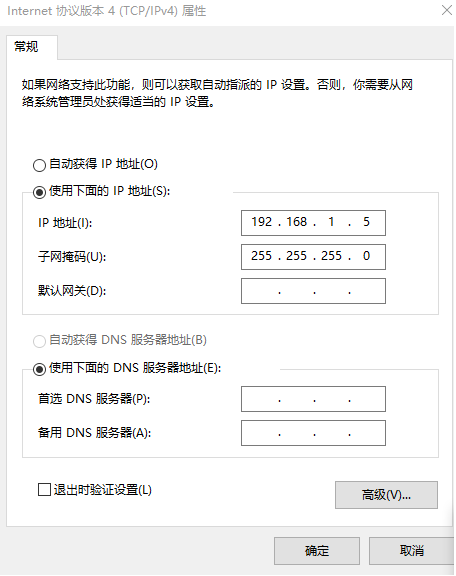
4. Set the IP address of the computer.
Open “Network and Internet”setting. Select “Internet Protocol version 4 (TCP / Ipv4) properties”. Change IP address to “192.168.1.xxx”(xxx is in 0~255,крім 192.168.1.36 and 192.168.1.100)。
5. Get data
There are three methods to get data from M51 ground unit, using Mission Planner:
- UDP port via Ethernet;
- TCP port via Ethernet;
- УАПП (Com)
5.1 Get data from UDP port.
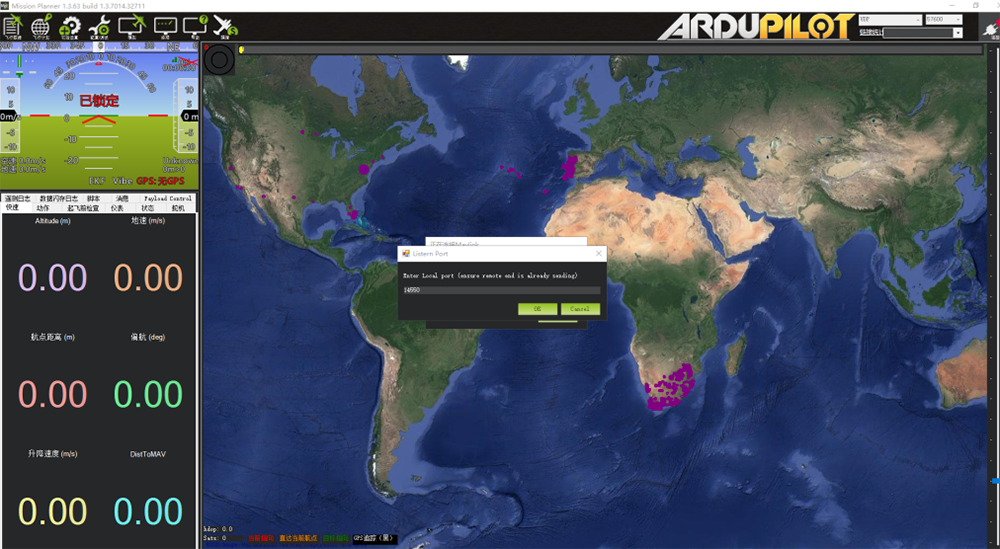
Open Mission Planner,select UDP,click the “connect” button, it will bring up a new window ‘Listen port’,change the port to 14550(If the UDP port number has been changed on the web page, please fill in the new number. Для отримання додаткової інформації, please go to the web page configuration).Then click “OK”, Mission Planner will get flight data。
5.2 Get data from TCP port.
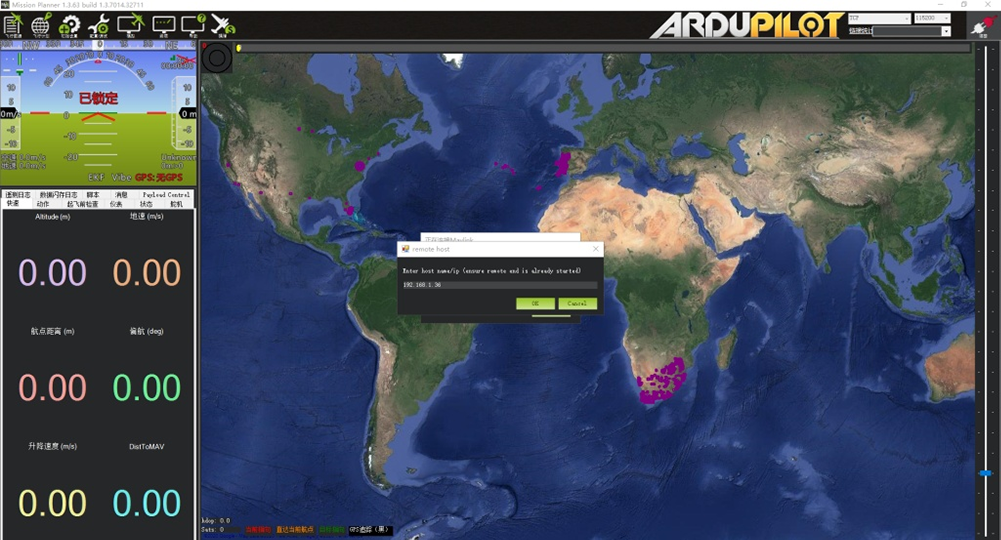
Open Mission Planner,select TCP,click the “connect” button, it will bring up a new window ‘Listen port’,fill in the blank with IP: 192.168.1.36, remote port is 5760
(If the IP address and TCP port number has been changed on the web page, please fill in the new IP and port number. Для отримання додаткової інформації, please go to the web page configuration).Then click “OK”, Mission Planner will get flight data.
5.3 Get data from UART(Com);
Connect the ground unit UART1 with a UART(TTL)
to USB converter to the computer. Before this, будь ласка
install the driver in the computer.
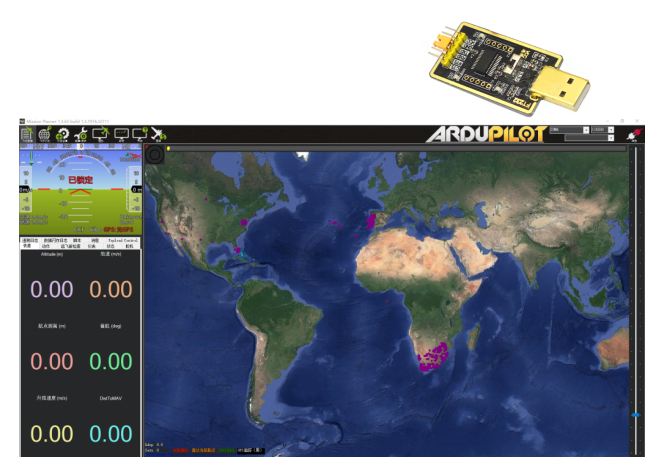
Open Mission Planner, select COM (Please check the COM number) and the right baud rate,click the “connect” button, Mission Planner will get flight data.
6. Get video
When you open the Mission Planner, click Video and then Set GStream Source,as show below:
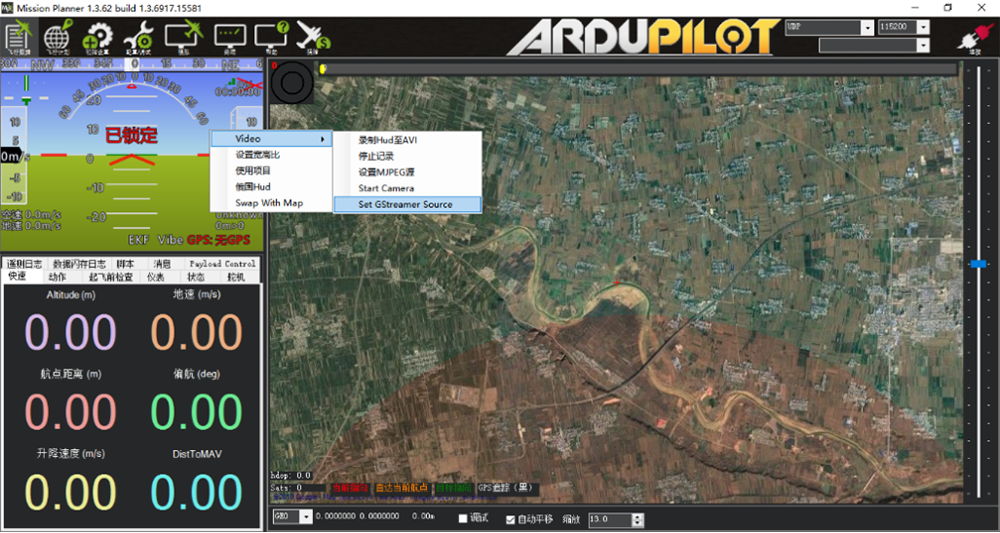
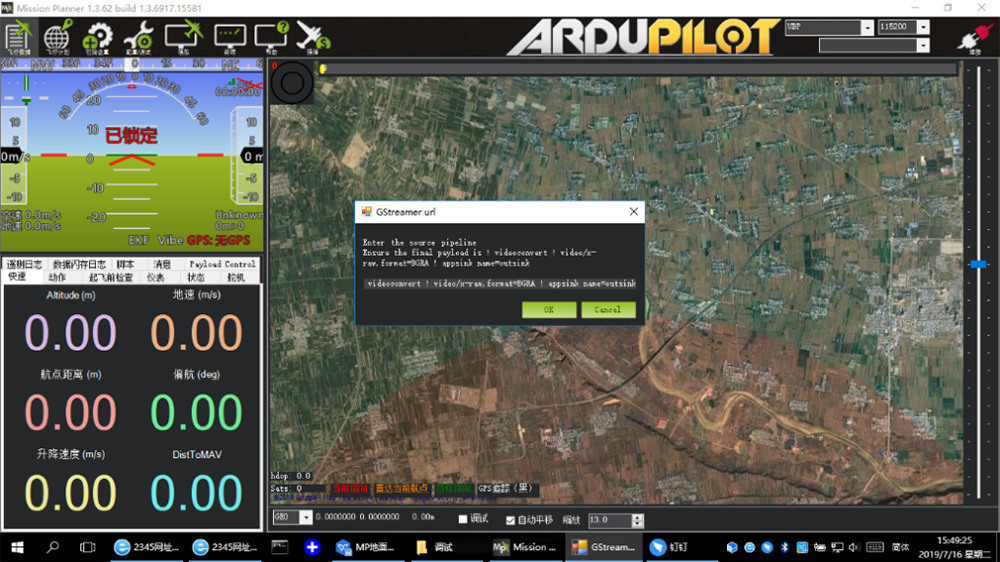
Input the address: rtspsrc location=rtsp://192.168.1.36/stream0 latency=0 ! decodebin ! videoconvert ! video/x-raw,format=BGRA ! appsink name=outsink
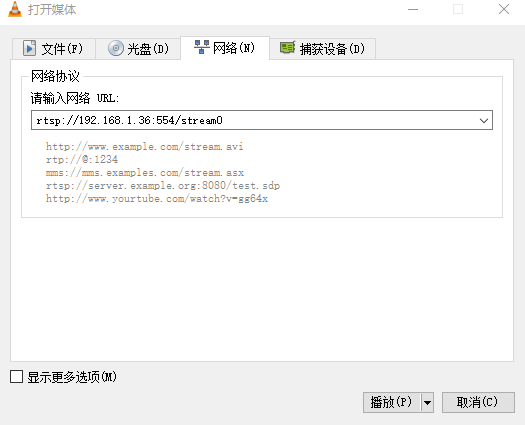
M51 with VLC
- Set the IP address of the computer as mention above. Make sure M51 is working properly.
- In the “open media” page, please input the following address:
rtsp://192.168.1.36:554/stream0
Improve RC controller distance through SBUS
- Connect air unit SBUS to flight controller RC IN.
Using the SBUS cable in the accessory box to connect the air unit to the flight controller. The cable is 3 шпилька.
увагу:The SBUS port of air unit is output. The maximum of +5V output current is 1A. If you don’t need the +5V, let it open. Do not take it as input. в іншому випадку, the stability of the system will be affected.
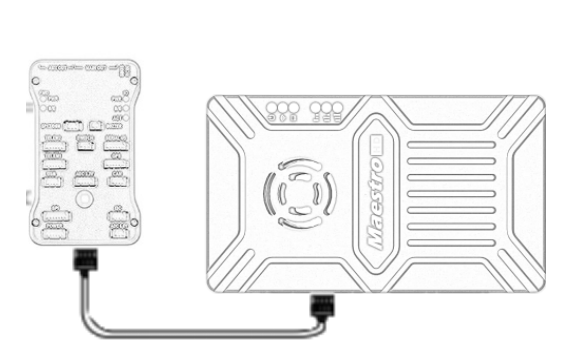
- Connect the RC receiver to the ground unit
Using the SBUS cable in the accessory box to connect the ground unit to the RC receiver.
увагу:The SBUS port of ground unit is input. The maximum of +5V output current is 1A. You can use it to power the RC receiver. Please pay more attention to the cable line order.

Recording video on ground unit
1. Inserted the USB storage device into the USB port on the ground unit. The HDMI output display “USB device is inserted”.
2. Press the button on the ground unit for 3 seconds to start recording. The HDMI output display “Recording…” and start timing recording.
3. To stop recording, hold down the button for 3 секунд. The video is automatically saved to the storage device.
4. You can play video with third-party video players.
Maestro Assistant
Interface of Maestro Assistant
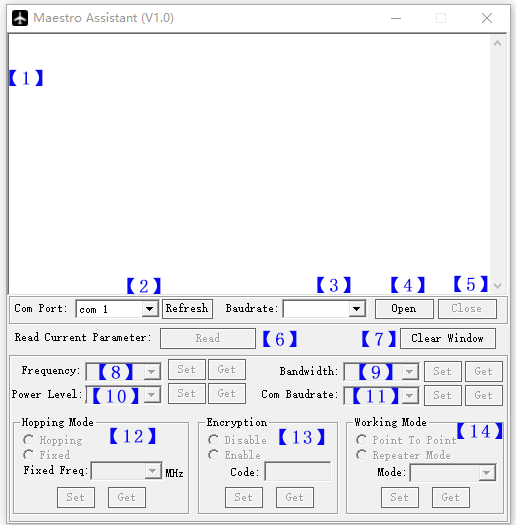
Опис функції:
【1】Information display:display status information for the M51。
【2】UART(Com) вибрати:Select the right COM number of the computer to connect M51. If you want to change to another COM , please click the ‘Refresh’ button.
【3】Baud rate select:Select the right baud rate for the COM. Make it the same as M51 UART1.
【4】Open COM button.
【5】Close COM button.
【6】Read current parameter button:click this button to get the current parameter of device。
【7】Clear window button: to clear the information display.
【8】Select frequency:There are three frequency bands to be selected——800MHz/1.4GHz/2.4GHz. Choose the band you needed,and click ‘Set’ button to complete setup. Click the ‘Get’ button to get current frequency band.
【9】Select BW:There are four BW to be selected——3MHz/5MHz/10MHz/20MHz. Choose the BW you needed,and click ‘Set’ button to complete setup. Click the ‘Get’ button to get current BW.
【10】Select Power Level:There are three power level to be selected——High/Mid/Low Choose the power level you needed,and click ‘Set’ button to complete setup. Click the ‘Get’ button to get current power level.
【11】Select baud rate:You can select the right baud rate for M51 Uart1 in this box.
Choose the baud rate you needed,and click ‘Set’ button to complete setup. Click the ‘Get’ button to get current baud rate.
【12】Select hopping mode: There are two mode to be selected——Hopping/Fixed. Choose the mode you needed,and click ‘Set’ button to complete setup. Click the ‘Get’ button to get mode. When you select Fixed mode, you need to choose a fixed frequency below. The fixed frequency is related to frequency band and BW.
【13】Select Encryption: You can disable/enable the encryption. When enable this function, you can set your private password. The password should in the range of 100000~999999. Devices with different password do not link.
【14】Select Working mode: There are two working mode of M51——Point to Point mode and Repeater mode. Choose the working mode you needed,and click ‘Set’ button to complete setup. Click the ‘Get’ button to get current working mode. This function only needs to be set up on the M51 air unit. The ground unit can synchronize automatically. If you select Repeater mode, you need to select the air unit whether it is TX or repeater.
How to use Maestro Assistant
1. Connect M51 with Maestro Assistant。
Maestro Assistant is a Windows software that configures M50/M51. Перед конфігурацією, please connect the UART1 to computer via UART(TTL) to USB converter.
Select the right COM and baud rate. Click ‘open’ button.
2. Read current parameter。

After step1, click ‘Read’ button. All current parameter will print on the information display. Because the Working mode is only for air unit. The Working mode box will turn grey on ground unit configuration.
3. Конфігурації.
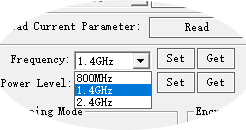
3.1 смуга частот
There are three frequency bands to be selected
——800MHz/1.4GHz/2.4GHz. You can choose the
suitable frequency band according to local regulations.
The specific frequencies for each band are as follow:
800МГц:806~825 МГц;
1.4ГГц:1427~1447MHz;
2.4ГГц:2408~2480 МГц;
3.2 ширина смуги
There are four BW to be selected——3MHz/
5МГц/10 МГц/20 МГц. The greater the BW, the more
data can be transmitted, but the weaker the
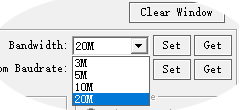
анти-втручання. In Fixed frequency mode, M50/M51 will have
more frequency to fix with small BW.
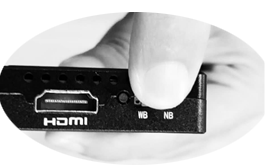
Additional, there is a shortcut key on M50/M51.
You can change BW easily. While NB is narrow band,
and WB is wide band. For both the air and ground unit,
the shortcut key should in the same place. в іншому випадку, they can not link.
3.3 потужність РЧ
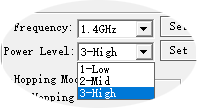
M50/M51 has three levels of power to choose.
In order to cause interference between devices, будь ласка
select the appropriate transmission power. The specific
RF power values are as follow:
1-Низька:15дБм;
2-середина:20дБм;
3-Високий:25дБм。
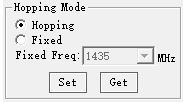
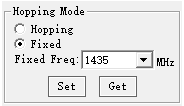
3.4 Hopping/Fixed Mode
There are two mode to be selected——Hopping
/Виправлено. In Hopping mode, M51 can automatically adjust
frequency when there is interference. In fixed mode,
the device is fixed to a special frequency . So in one
смуга частот, up to four sets of devices can be used.
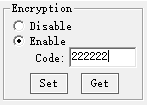
3.5 шифрування
The wireless signal can be encrypted during transmission.
When enable this function, you can set your private password.
The password should in the range of 100000~999999. Devices with different password do not link. When disable this function, different M51 air and ground can link each other.
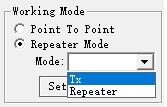
3.6 Режим роботи
M51 can work in Point to Point Mode and Repeater
режим. Only the air unit of M51 need to be set. The ground
unit can synchronize automatically. In Repeater mode, the
air unit can be set to TX (передавач) or Repeater.
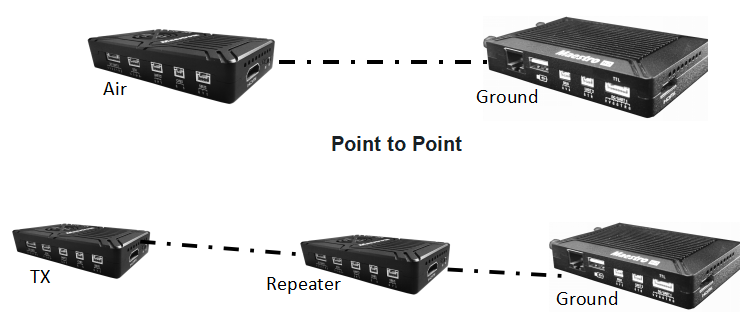
With Repeater mode, M51 can be easily used under NLOS situation. You only need to buy one more air unit and then can establish a repeater system easily.
M51 Web UI Configuration Description
Parameter of M51 can also be set through web UI. User can enter IP address through the browser to access the web UI. The air unit default IP is 192.168.1.100. The ground is 192.168.1.36. In Repeater mode. TX is 192.168.1.100. Repeater is 192.168.1.101.
If you change the device to another IP address, please access the web UI through the new IP. If you forget the IP you changed, press the button on the device for 10 seconds when the device is power on to restore to factory settings.
You need to change your computer IP to 192.168.1.X so as to access the device web UI. Як показано на наступному малюнку:
M51 Air Web UI
1. Ввійти
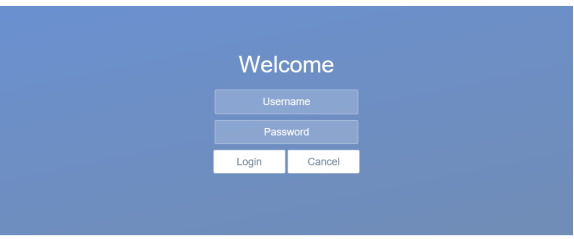
After you enter IP address 192.168.1.100 in the browser, you will see the ‘Welcome’ page. Default username is: адмін, пароль є: 123456. Then you can login.
2.Air setting
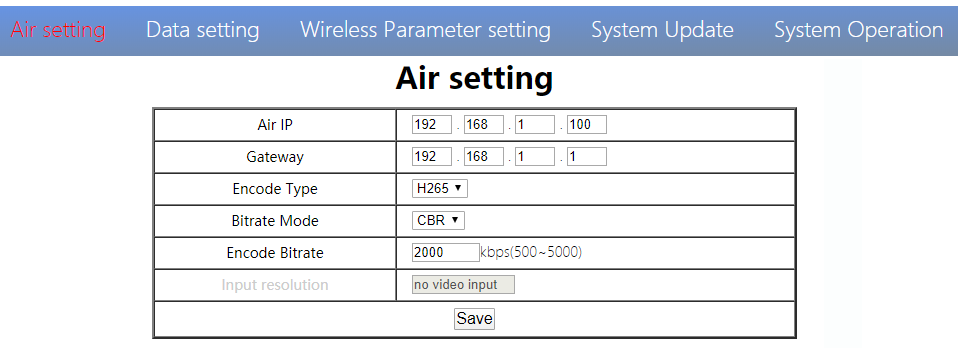
In Air setting page, user can change air IP 、 Gateway and other parameter. You can refer to the table below.
| параметр | Цінність | опис |
| Air IP | дефолт 192.168.1.100 | User can change |
| Ворота | дефолт 192.168.1.1 | User can change |
| Encode Type | H265/H264 | Default H265 |
| Bit rate Mode | CBR/ VBR | Default CBR |
| Encode Bit rate | 500kbps~5Mbps | User can change, default 1M |
| Input resolution | Input automatic detection | display current HDMI input resolution |
If you change the device parameter, it will be in effect after rebooting. If you change IP address, please enter the new address in your browser after rebooting.
3.Data setting
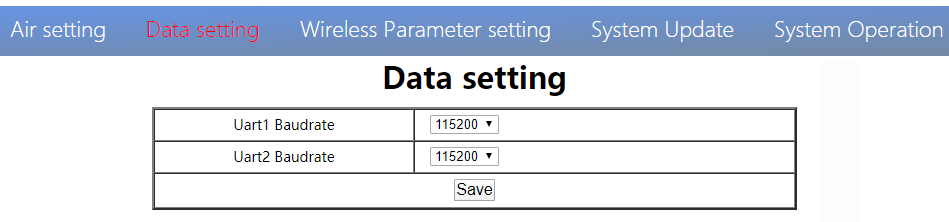
User can change Baud rate of UART1 and UART2 in Data setting page. It will be in effect after rebooting.
4. Wireless Parameter setting
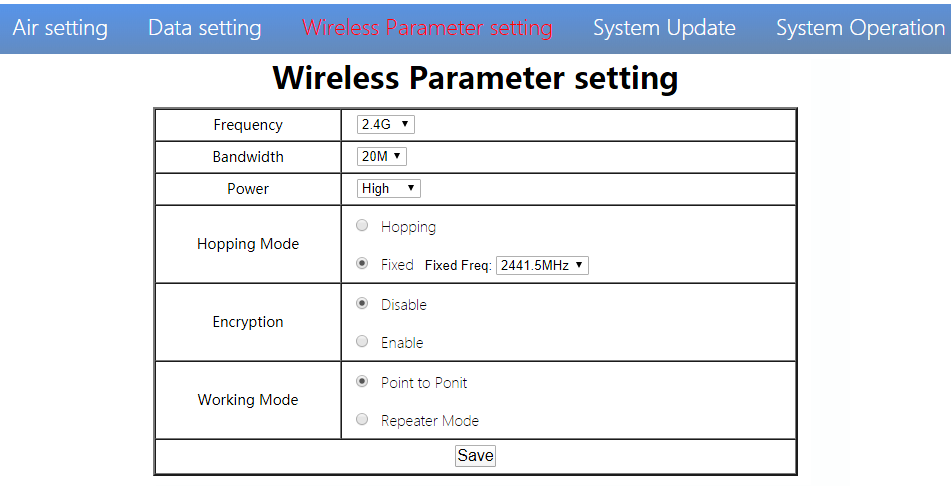
User can change wireless parameter on Wireless Parameter setting page . You can refer to the table below.
| параметр | Цінність | опис |
| частота | 800M/1,4G/2,4G | опціональний |
| ширина смуги | 3/5/10/20M | опціональний |
| потужність | High/Middle/low | опціональний |
| Hopping Mode | Hopping/ Fixed | опціональний |
| шифрування | Disable/ Enable | опціональний |
| Режим роботи | Point to Point Repeater Mode | Only the air unit of M51 need to be set. The ground unit can synchronize automatically |
Web UI configuration is the same as Maestro Assistant. User can check it in ‘How to use Maestro Assistant’ part 3 for more details.
When you configure parameter through Web UI, It will be in effect after rebooting
5.Оновлення системи
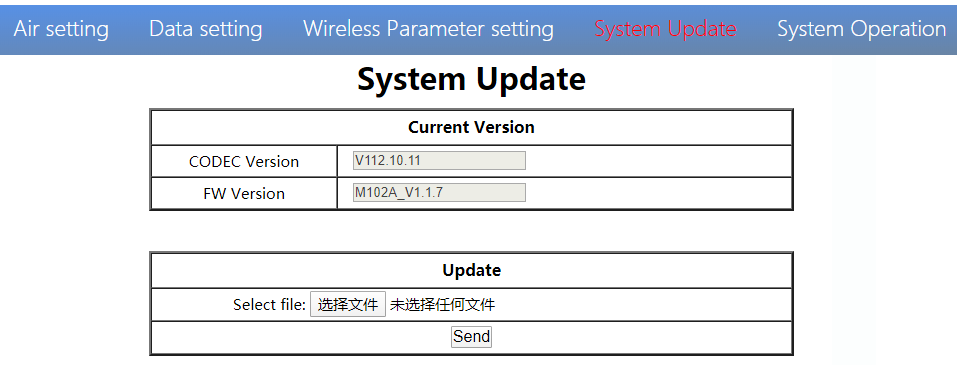
User can update CODEC version and FW version in System Update page. Before update, please download the latest software version from our website.
Click ’browse…’. Select the upgrade file. Click ‘Send’. You will see the upgrade progress bar. The system will restart when the upgrade is complete. You can check the CODEC and FW version in this web page
Додатково, CODEC Version is for video encoding. The upgrade file is large and no need to upgrade frequently. So we update the CODEC and FW files separately. Please pay attention to the version separately..
6.System Operation
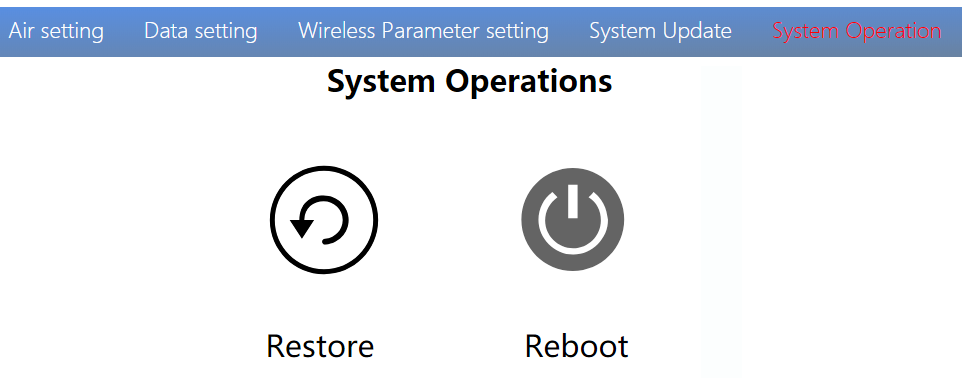
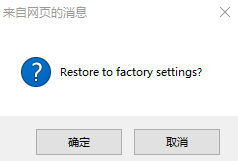
User can Restore and Reboot on System Operation page. While ‘Restore’ is to restore all parameter to factory settings。
“Reboot” is used for system rebooting。
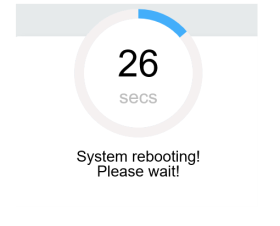
If user do not change the device IP address, it will go to the Login page after rebooting. If you change the IP address, you need to enter the new IP address in your browser after rebooting.
M51 Ground Web UI
1.Ввійти
After you enter IP address 192.168.1.36 in the browser, you will see the ‘Welcome’ page. Default username is: адмін, пароль є: 123456. Then you can login.
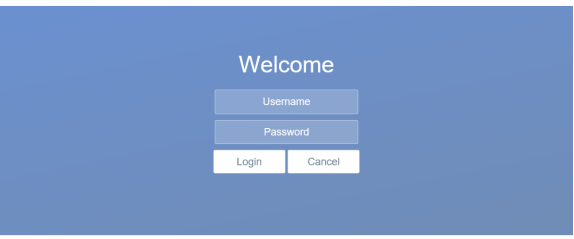
2.Ground setting
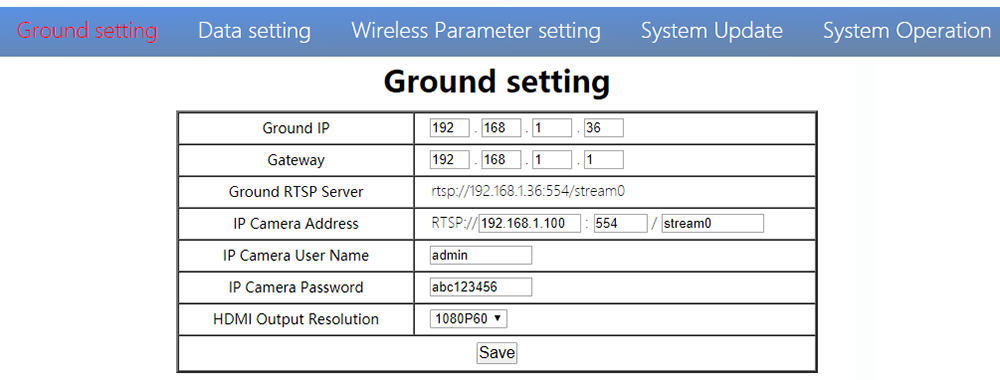
In Ground setting page, user can change air IP 、 Gateway and other parameter. You can refer to the table below.
| параметр | Цінність | опис |
| Ground IP | дефолт 192.168.1.36 | User can change |
| Ворота | дефолт 192.168.1.1 | User can change |
| Ground RTSP Server | User can not edit. | Used to tell user RTSP server address |
| IP Camera Address | Default is 192.168.1.100,the encoder IP of air unit | Users can change to their own IP camera address |
| IP Camera User Name/Password | According to the IP camera | If the camera needs certification, please enter the right name and password |
| HDMI Output Resolution | 1080P60/1080P50/1080P30/1080P25/1080P24/1080I60/1080I50/720P60/720P50 | User can set the HDMI resolution |
If you change the device parameter, it will be in effect after rebooting. If you change IP address, please enter the new address in your browser after rebooting.
3.Data setting
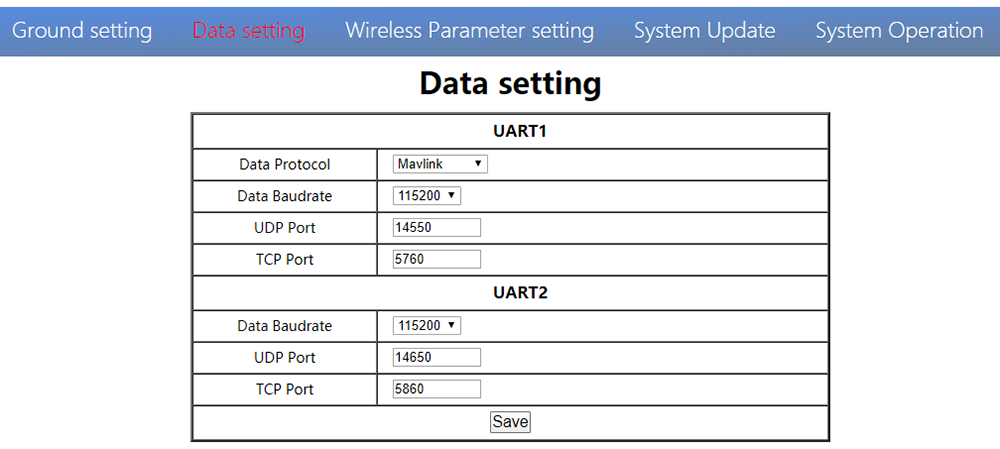
User can change parameter of UART1 and UART2 in Data setting page. UART1 supports two protocols—Mavlink (дефолт) and Transparent. User can change protocol、швидкість передачі даних、UDP/TCP port easily. The UART data can be transmitted to the computer through the Ethernet of the ground unit.
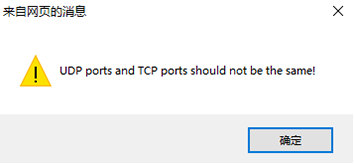
увагу,UDP and TCP ports of UART1 and UART2 should not be the same.
4. Wireless Parameter setting
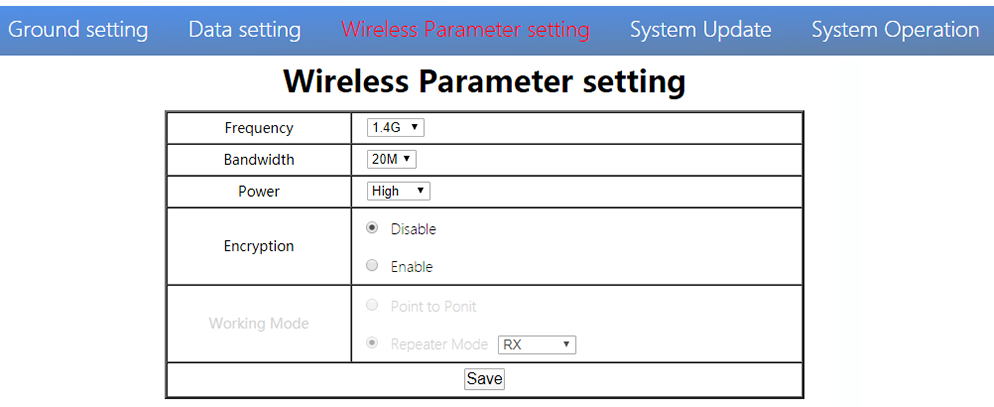
User can change wireless parameter on Wireless Parameter setting page . You can refer to the table below.
| параметр | Цінність | опис |
| частота | 800M/1,4G/2,4G | опціональний |
| ширина смуги | 3/5/10/20M | опціональний |
| потужність | High/Middle/low | опціональний |
| шифрування | Disable/Enable | опціональний |
| Режим роботи | Synchronize automatically | Turn grey |
When you configure parameter through Web UI, It will be in effect after rebooting
5. Оновлення системи
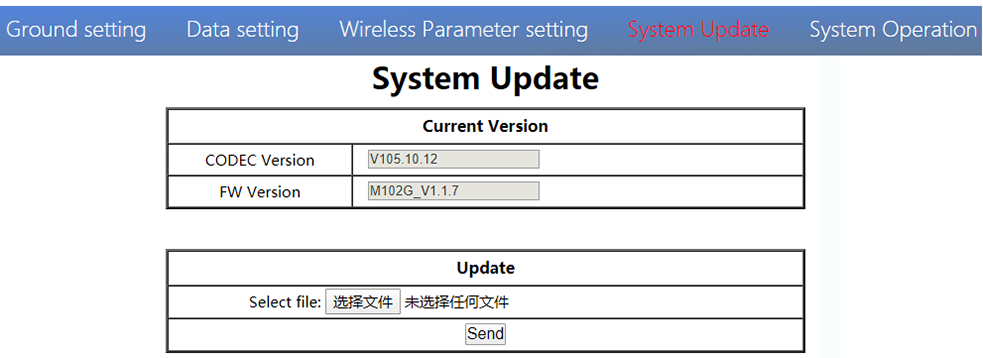
Both ground and air unit are upgraded in the same way. Please refer to other parts of this document.
6. System Operation
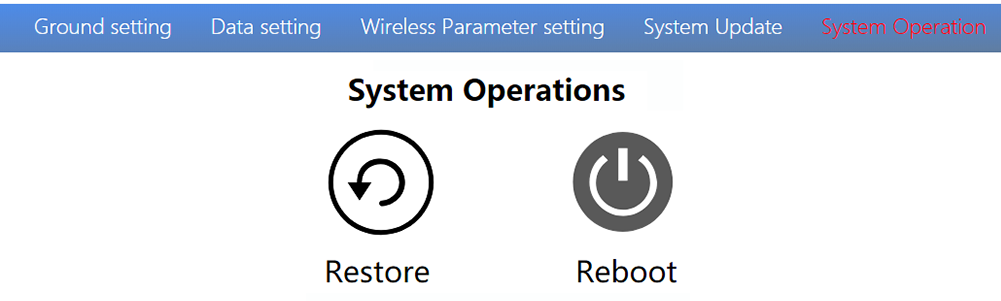
Both ground and air unit system operation are in the same way. Please refer to other parts of this document.
специфікація
| Діапазон частот | 800МГц/1,4 ГГц/2,4 ГГц |
| Діапазон частот | 800МГц:806МГц~825 МГц1,4 ГГц:1427МГц~1447 МГц 2,4 ГГц:2408MHz~2480MHz |
| Ширина стрічки | 3МГц/5 МГц/10 МГц/20 МГц |
| режим модуляції | OFDM |
| EIRP | 25дБм ± 1 дБ |
| чутливість | ≤-92dBm |
| діапазон | 17км*1 |
| Швидкість передачі відео | 500k~5Mbps |
| DC 9 ~ 28V (Battery 3S~6S) | |
| Повітря | 6.5W |
| Земля | 5W |
| антена | Air 2*MMCX ,Ground 2*SMA |
| УАПП | TTL 3.3V,1 стартовий біт, 8 біт даних, 1 стоп-біт, немає паритету. |
| UART1and UART2 | |
| Швидкість передачі даних 115200 (за замовчуванням),57600, 38400, 19200, 9600 | |
| HDMI (Тип A) | 1 |
| SBUS | 1 |
| Мережевий порт | 1 (Air GH1.25 4Pin) |
| 1(Ground RJ45) | |
| USB (Тип A) | 1 (Земля) |
| CVBS | 1(Air GH1.25 2Pin) |
| дозвіл | 1080P60 backward compatible |
| CODEC | H.265 / H.264 |
| Швидкість передачі відео | 500kbps~5Mbps |
| Video delay | below 250ms |
| інтерфейс | MMCX |
| тип | Glue stick antenna |
| Тип Поляризація | вертикальний |
| коефіцієнт посилення | 2.5дБи |
| SWR | ≤2.0 |
| інтерфейс | вища школа |
| тип | Скловолоконна антена |
| Тип Поляризація | вертикальний |
| коефіцієнт посилення | 7дБи |
| SWR | ≤2.0 |
| Робоча температура | -40℃ ~ +70 ℃ |
| Температура зберігання | -40℃ ~ 85 ℃ |
| вологість | 5~ 95%,без конденсації |
| розмір | Повітря 93.5 X 54.5 X 17 mmGround 112 X 63.5 X 19 мм |
| вага | Air 105gGround 143g |
*1 Відстань перевіряється за умови відсутності перешкод та LOS.
Примітка:The explanation right of the above product specification belongs to Shenzhen Mainlink Aero communication Technology Co., LTD.
часто задаються
| 1 опис | The power indicator light is not on after powering up |
| рішення: 1. Check the wiring order of the power cable. 2. Check the DC power range. | |
| 2 опис | Link indicator light is not on after powering up. |
| рішення: 1. Check that the RF cable is connected properly. 2. Check that the BW shortcut keys of the air and ground are in the same position. 3. Check the antenna is OK. | |
| 3 опис | The air and ground link is OK, but no HDMI output. |
| рішення: 1. Check that camera is work well and the cable is in good connection; 2. Check the HDMI monitor; 3. Please contact our company’s after-sales service. | |
| 4 опис | DescriptionHDMI monitor output OSD“Transmitter Loss”. |
| рішення: 1. This OSD means the ground unit does not establish a connection with the air unit. 2. Check the antenna and the RF cable. 3. Please contact our company’s after-sales service. | |
| 5 опис | HDMI monitor output OSD “No Video Source Input”。 |
| рішення: 1. This OSD means the ground unit has established a connection with the air unit. But the air does not add a camera or the camera can not be recognized by the air unit. 2. Check the HDMI cable or the Ethernet cable that connecting the camera and the air unit. 3. Please contact our company’s after-sales service. | |
| 6 опис | The link indicator light is OK. But no data output. |
| рішення: 1. Check the UART cable wiring order. 2. Check the UART baud rate. 3. Please contact our company’s after-sales service. | |
| 7 опис | The ground unit can’t output RTSP video streaming. |
| рішення: 1. Check the cable connection and wireless link is OK. 2. Check the IP address of computer is right. 3、Check the RTSP server address is correct. 4、Please contact our company’s after-sales service. | |
| 8 опис | SBUS communication error. |
| рішення: 1.Check the wire order of the SBUS and +5V is right. 2. Please contact our company’s after-sales service. |
Примітка:Для отримання додаткової інформації, please check out our official video tutorial. Foreign users please check You Tube .
задавати питання
Дякуємо за вашу відповідь. ✨