


6-7GHz 10W FPV Analog Video Transmitter
Dominate long-range FPV with a powerful 10W 6–7GHz analog video transmitter built for professionals.
Break free from crowded bands using ultra-stable 6–7GHz FPV transmission with up to 50km range.
Experience crystal-clear analog FPV video powered by a rugged 10W 7GHz transmitter.
Designed for extreme range, this 6–7GHz FPV VTX delivers unmatched penetration and stability.
Table of Contents
Overview
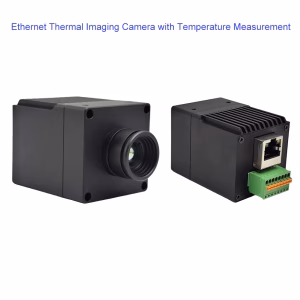
The 6-7GHz FPV Analog Video Transmitter is a high-power long-range video transmission module designed for professional FPV systems, UAVs, and industrial remote monitoring. Operating within the 6.0–7.2GHz frequency band, this VTX provides reliable analog video transmission with ultra-long range and minimal interference from the crowded 5.8GHz spectrum.
Built for demanding aerial and ground applications, the module delivers adjustable RF output power up to 10W, ensuring strong penetration and stable signal quality even in complex environments. It supports a wide voltage input of 7–28V, making it compatible with various UAV and vehicle power systems.
The VTX includes LED channel and frequency indicators for intuitive control, MMCX output interface for robust connection, and automatic power boost functionality to reach full 10W output after startup. With its compact metal housing and efficient cooling design, the 7.0G FPV transmitter is ideal for long-range FPV flights, inspection drones, or high-reliability analog video links.
Features
-
High Transmission Power: Adjustable RF output up to 10W (40dBm) for long-distance analog video transmission.
-
Wide Frequency Range: Operates from 6.0 to 7.2GHz, avoiding interference from common 5.8GHz FPV systems.
-
Wide Voltage Input: Accepts 7–28V DC, compatible with 2S–6S LiPo batteries.
-
Auto Power Boost: Gradual power increase from 200mW → 600mW → 1.8W → 5.4W → 10W in 50 seconds after startup.
-
Compact and Lightweight: Measures 80×45×22mm, weighing only 60g (excluding connectors).
-
LED Channel Display: Built-in LED indicators clearly show active channel and frequency.
-
MMCX RF Output Connector: Ensures strong mechanical reliability and low-loss signal transmission.
-
Easy Channel & Frequency Selection: Button-controlled channel and frequency with visual LED indication.
-
Stable PLL Frequency Lock: Prevents drift and ensures stable analog video signal.
-
Durable Silicone Power Cable: Pre-installed PH2.0-3P connector (Red: 24V / Black: GND / Yellow: Video).
-
Long Transmission Range: Supports 20–50km line-of-sight (depending on antenna type and environment).
Specifications
| Parameter | Specification |
|---|---|
| Frequency Range | 6.0–7.2GHz |
| Output Power | 38–40dBm (up to 10W) |
| Operating Voltage | 7–28V DC |
| Current Consumption | ≤1A @24V (38dBm) |
| Dimensions | 80×45×22mm |
| Weight | 60g (without connector) |
| RF Output Port | MMCX |
| Power Connector | PH2.0-3P (Red 24V, Black GND, Yellow Video) |
| Cable Length | 150mm silicone wire |
| Transmission Distance | 20–50km LOS |
| Display | LED indicators for channel and frequency |
| Channel Count | 8 channels × 8 frequency points |
| Frequency Control | PLL locked, LED indication |
| Startup Power | 200mW (default) |
| Power Increase | Auto boost to 10W in 50 seconds |
Channel indicator
| CH | LED #4 | LED #2 | LED #1 |
| CH_0 | off | off | off |
| CH_1 | off | off | on |
| CH_2 | off | on | off |
| CH_3 | off | on | on |
| CH_4 | on | off | off |
| CH_5 | on | off | on |
| CH_6 | on | on | off |
| CH_7 | on | on | on |
Channel loop diagram
When powered on, the blue LED stays on, indicating Channel 1.
Press the button once — the red LED flashes once — to switch to Channel 2.
Press the button twice — the red LED flashes twice — to switch to Channel 3, and so on.
After pressing the button eight times, it returns to Channel 1, with the blue LED staying on.

Frequency point loop diagram

Operating Instructions

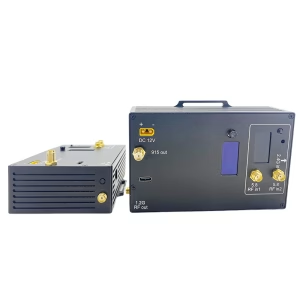
| Item | Description |
|---|---|
| ATT Button | One-touch power increase. The video transmitter defaults to 200 mW at startup. Press this button before takeoff to increase the power every 10 s, up to a maximum of 10 W. |
| Channel Button | Button for selecting channels. |
| Channel Indicator | Channel indicator area. Selecting different channels will light up the corresponding indicator. |
| Frequency Button | Button for selecting frequency points. |
| Frequency Indicator | Frequency display light. Blue LED steady indicates Frequency Channel 1, red LED indicates other frequency channels. |
| Jumper Interface | Jumper connection port, used to connect the antenna. |
| Power Interface | Power input port. |
Steps
Step 1: Connect the antenna and power on.
Step 2: Press the channel selection button to choose the desired channel. Channels cycle from 1 to 7; press once to switch to the next channel. Each channel has a corresponding indicator light.
Step 3: Press the frequency selection button. Each channel has 8 selectable frequency points. Choose the desired frequency point within the channel. A steady blue LED indicates the first frequency point of the channel. For other frequency points, press once to switch, and the red LED flashes once.
| No.\ CH | 0 | 1 | 2 | 3 | 4 | 5 | 6 | 7 |
| 1 | 6110 | 6130 | 6150 | 6170 | 6190 | 6210 | 6230 | 6250 |
| 2 | 6270 | 6290 | 6310 | 6330 | 6350 | 6370 | 6390 | 6410 |
| 3 | 6430 | 6450 | 6470 | 6490 | 6510 | 6530 | 6550 | 6570 |
| 4 | 6590 | 6610 | 6630 | 6650 | 6670 | 6690 | 6710 | 6730 |
| 5 | 6750 | 6770 | 6790 | 6810 | 6830 | 6850 | 6870 | 6890 |
| 6 | 6910 | 6930 | 6950 | 6970 | 6990 | 7010 | 7030 | 7050 |
| 7 | 7070 | 7090 | 7110 | 7130 | 7150 | 7170 | 7190 | 7210 |
| 8 | 6115 | 6265 | 6425 | 6585 | 6745 | 6905 | 7065 | 7185 |
Power Mechanism
-
After powering on, the transmitter maintains an output of 200 mW.
-
Press the SW_ATT button to trigger an automatic power increase program. Timing starts immediately upon pressing.
-
Power ramps up through 5 levels over a total of 50 s:
-
200 mW for 10 s → 600 mW for 10 s → 1800 mW for 10 s → 5400 mW for 10 s → 10 W stable output.
-
Application
-
Long-range FPV video systems for UAVs and RC aircraft
-
Professional aerial photography and inspection drones
-
Ground-to-air analog video monitoring
-
Law enforcement, border patrol, and emergency response links
-
Industrial wireless monitoring and testing systems
-
Robotics and remote vehicle video feedback
Customize Options
-
Adjustable output power levels (200mW–10W)
-
Optional SMA or MMCX connectors
-
Custom frequency bands (within 6–7.2GHz)
-
Extended cable lengths or special wiring options
-
OEM/ODM housing, label, and logo customization
-
Integration support for custom drone or FPV systems
7GHz FPV VTX transmitter


7GHz FPV VRX receiver


FAQ
Q1: What’s the maximum range of this 7.0G FPV transmitter?
A1: Under line-of-sight conditions with directional antennas, it can achieve 20–50km transmission distance depending on terrain and environment.
Q2: Can I use it with standard FPV receivers?
A2: It is designed for analog video transmission, compatible with FPV VRX modules or receivers operating in the 6–7GHz range.
Q3: How does the automatic power increase function work?
A3: The transmitter starts at 200mW and automatically steps up every 10 seconds until it reaches 10W after 50 seconds.
Q4: How do I select channels and frequencies?
A4: Use the Channel and Frequency buttons. Each press switches to the next channel or frequency, and the LED indicators display the current selection.
Q5: What power supply should I use?
A5: The module accepts 7–28V DC, suitable for direct connection to 3S–6S LiPo battery packs or regulated DC sources.
Q6: Is this module digital COFDM or analog?
A6: This is a pure analog FPV VTX, providing real-time video transmission with zero encoding latency.
Q7: What are the advantages of using 7GHz instead of 5.8GHz?
A7: The 7GHz band is less congested and provides stronger anti-interference performance, especially in environments where 5.8GHz FPV systems are heavily used.
Q8: What frequency range and transmit power options are available for your VTX and VRX?
A8: Our VTX and VRX products currently work in the 6110–7185 MHz range. We recommend the 10W PA version, as higher transmit power provides longer range and stronger anti-interference performance. Although higher power consumes more battery, the transmit power can be adjusted based on your practical scenario. Compared to a 3W PA model, a 10W PA gives you more flexibility in complex electromagnetic environments. Additionally, we offer the 10W PA at a better price than the 5W PA, making it a cost-effective choice.
Q9: Does the 7G FPV VTX support Tramp or IRC / SmartAudio control?
A: The 7G FPV VTX supports IRC (SmartAudio) control. Tramp protocol is not supported.
Q10: Can the VTX be controlled during flight?
A: Yes. When the VTX is connected to the IRC / SmartAudio control port on the flight controller, it can be controlled during flight through the OSD menu using the radio transmitter.
Q11: What parameters can be adjusted via IRC control?
A: You can change the frequency (channel switching) via IRC control.
Q12: Can the output power be changed via IRC?
A: No. Output power cannot be adjusted through IRC control. Only frequency/channel switching is supported.
Q13: Is channel switching in flight supported?
A: Yes. In-flight channel switching (frequency change) via OSD is fully supported and works as standard FPV usage.


Upgrade your FPV system with a high-power 10W transmitter for reliable long-distance video.
Fly farther with confidence using a 6–7GHz FPV VTX that avoids 5.8GHz interference.
Professional-grade 7GHz FPV transmitter with smart power ramping and PLL stability.
Built for UAVs and industrial use, this 10W FPV VTX ensures strong and steady signals.


iVcan.com –
ChatGPT said:
We’ve tested the 6–7 GHz 10 W FPV Analog Video Transmitter on our professional UAV setup, and it delivers truly impressive range and signal quality. The 10 W output power provides a strong, stable analog video feed even in environments where 5.8 GHz systems often struggle with interference. The auto power boost function is convenient — starting at 200 mW and ramping smoothly to full 10 W in under a minute — protecting both the module and antenna during startup.
The LED indicators for channel and frequency make tuning simple, while the wide 7–28 V input works seamlessly with standard drone power systems. Its compact aluminum housing handles heat efficiently, and the MMCX connector ensures reliable RF performance.
For long-range FPV, inspection drones, or analog video monitoring missions requiring 20–50 km line-of-sight, this transmitter offers unmatched penetration, stability, and ultra-low latency — an ideal choice for professional pilots and industrial UAV applications.