


목차
How to test the data transmission on HDMI to the ethernet encoder board?
Please check the below video on YouTube.

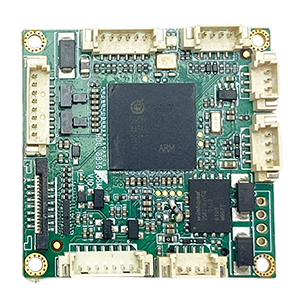
This is our video, 오디오, and serial data encoder board, 1746, an HDMI + CVBS or SDI + AHD + CVBS + serial port data input, ethernet rj45 output encoder board, for h264 or h265, with low latency yes / no switch model.
The serial port is connected to the computer, we will use one serial port tool software as the serial port data source. The computer will send data to this board through the serial port. This board also connects to HDMI video and audio input. Its ethernet output cable is connected to the same computer. We will use another computer software as the serial port data receiver. In this test video, the receiver software is Windows OS, we also can offer you Linux or other operating systems.
The encoder board’s ethernet cable and serial cable are connected to the computer. Now let’s take a look at the parameter configuration, type the encoder default IP address (192.168.1.30) to open the web server page. Local IP is his own IP address. 여기, enter a multicast address. Just to show you the function, you’ll know why it’s set up like this later.
Then the UDP port he sent, It will send the data to this multicast address later. Under this port, and through the UDP protocol, which is our custom protocol.
Now this coding board, You can see that he detects the current 1080P HDMI input, showing 1080P 60 비디오 입력. Here we choose H265,
low latency we choose no. All other options are automatic
좋아요, this is my serial port tool software, now the communication port is COM3 on my computer. The baud rate is 115200, and select Hexadecimal and Loop Send, one hundred millimeters period.
At the text area, we type some data, I want to send from the serial port data encoder to the computer receiver. The right window on my computer is the test program for receiving data.
Now let me explain these parameters. This is the command for the test program.
있다 4 parameters here, explain the first parameter, and I’ll go back to the program and take a look. The first parameter corresponds to H264 or H265. So look at the web page configuration. It means that the configuration of the encoding board is the same as the receiving parameters.
Here are the parameters. The first one you need to enter is 1, which means H265, For the second one, 입력하다 0, 0 means low latency is no.
The third is the UDP port number, just say which port to receive data from, and the encoding board is 8090. The fourth parameter is his receiving IP address. The multicast address should be the same as the encoding board’s, Then these parameters are ready.
Now let’s start testing, The serial port tool sends it in a loop, Then on the receiving window, we are receiving. It keeps sending this aa, Then it shows here aa.
Now we add data on the transmitter side, You can see that the data has been added here. It is real-time. This proves that the data is a transparent transmission. 질문이 있으시면, please get in touch with us.
In this coming video, I will show you how to use the encoder board to transmit serial data except the video.
첫 번째, let’s take a look at this command. It has four parameters. This command can specify a maximum of four variable parameters. 모두 4 can be specified, Or I can specify only 3 like now, I can even specify two or one. If you don’t specify, it will be used by default. If I don’t specify the last parameter. The result is that it will not be able to receive the serial port data.
Look, this serial port tool is constantly sending data. Although it is sent, you will find that no data is received here. The reason is that you did not specify the multicast address. So it can’t receive the data.
This is for demonstration purposes only. I specifically set a multicast address on the parameter page. When the encoding board is set to send to the multicast address. The fourth parameter of the command, this multicast address must be entered, Otherwise you won’t receive the data.
I use a unicast address here, I specify the IP address of my current computer, Just change the target address to my computer’s IP,
Then you need to restart the software. Then let’s come back and take a look. When the code board completes the restart, The data should be received on the right window, Look, data is being received here.
If you modify other parameters in the encoder board’s page parameter settings, the command parameters on the receiving end must also be changed accordingly.
예를 들어, you don’t use H265 encoding, but H264, Let me try it too, 매우 낮은 대기 시간, select yes here this time, I modified the parameters of the encoding board. You will find that no data is received on the right side.
The reason is that when the parameters are modified on the coding board, they take effect immediately. If you don’t modify the receiving end, it will prompt an error.
So how can I modify it? The first parameter is H264, so you have to change it to 0. The second one is low latency, you need to change to 1
, After setting the parameters, run it again and the data will be received well. This is a program that runs under Windows. So it means that the parameters of the receiving program must be consistent with the parameters set on the encoding board parameter page.
The corresponding relationship is these four parameters, The first one is H264 or H265, The second is low-latency, The third is the UDP port number, The fourth is the IP address.
Let’s look at the source program again, Let’s modify it first. This is the annotation. Let’s turn on the comments first. Now he will print out the decoded video. Here we also print out the decoded audio.
Here we will debug directly. If you have this software, You don’t have to type in commands at all. Use this software directly, You can adjust it to get the data you want, Because it runs it directly here, It doesn’t have those four parameters. Sometimes it uses the default parameters.
So to change the default H265, Look, the results are shown.
Let’s see what it shows. This is video data, This is the size, Then this indicates whether it is a key frame. This video is divided into i frame and p frame, The latter is the timestamp, This is increasing. You will find that this one is bigger than that one.
Then this is the audio it decoded, This is the size, Then this is its sampling rate 48K, 듀얼 채널, This is the decoded audio.
Then this is the decoded serial port data, 즉, the data we transmit with UDP, It will package the video, 오디오, and serial data together and transmit it, Then you take our program, You can explain it separately, Then you go back to do video and audio decoding. You can also do the serial port data analysis.
This is the video, 오디오, and data that can be obtained completely using UDP.
If you have any questions about the data transmission on HDMI to ethernet encoder, 저희에게 연락하게 자유롭게 느끼십시오.
인코더 모듈 보드


Decoder Modules Boards


사용자 정의 가능
새로운 인코더 제품
| 아니. | 제품명 | 구성 | 주요 특징 | 상태 |
|---|---|---|---|---|
| 1 | 듀얼 채널 USB UVC 가시광선 비디오 인코더 | 2× USB input | 듀얼 USB 카메라 비디오 인코딩 지원, and RTSP streaming; 로컬 CVBS/HDMI 출력; 전환 가능한 디스플레이 모드 | 양산 |
| 2 | 듀얼 채널 인코더 (1× USB 가시광선 + 1× USB 열화상 카메라) | 2× USB input | Supports dual USB camera (보이는 + 열의) 포착, 부호화, and RTSP streaming; 로컬 CVBS/HDMI 출력; 전환 가능한 디스플레이 모드 | 양산 |
| 3 | RTSP 디코더 HDMI/CVBS 디스플레이 모듈 | HDMI + CVBS 출력 | 최대 4×1080P@30fps RTSP 스트림 디코딩 지원; 비디오 스트리밍 프로토콜 전달 지원; HDMI/CVBS 출력 디스플레이 | Sample Available |
| 4 | RTSP 디코더 HDMI/CVBS 디스플레이 모듈 4.3"/5" LCD | HDMI 출력 + LCD 화면 | 최대 4×1080P@30fps RTSP 스트림 디코딩 지원; protocol forwarding; HDMI/CVBS 출력 디스플레이 | 디버깅 |
| 5 | 듀얼 채널 인코더 (1× USB 가시광선 + 1× CVBS 아날로그) | 1× CVBS + 1× USB UVC 입력 | 듀얼 비디오 (USB + CVBS), 인코딩 및 RTSP 스트리밍; 로컬 CVBS/HDMI 출력; 전환 가능한 디스플레이 모드 | 디버깅 |
| 6 | 듀얼 채널 인코더 (1× USB UVC + 1× AHD 아날로그) | 1× AHD + 1× USB UVC 입력 | 듀얼 비디오 캡처 (USB + AHD), 인코딩 및 RTSP 스트리밍; 로컬 CVBS/HDMI 출력; 전환 가능한 디스플레이 모드 | 디버깅 |
| 7 | 듀얼 채널 인코더 (1× CVBS + 1× AHD 아날로그 비디오) | CVBS + AHD 2 비디오 입력 | Dual analog video capture, 인코딩 및 RTSP 스트리밍; 로컬 CVBS/HDMI 출력; 전환 가능한 디스플레이 모드 | 디버깅 |
| 8 | 듀얼 채널 인코더 (1× CMOS 카메라 + 1× USB 열화상 카메라) | 1× USB 인터페이스 | CMOS 지원 + USB thermal camera capture, 인코딩 및 RTSP 스트리밍; 로컬 CVBS/HDMI 출력; 전환 가능한 디스플레이 모드 | 양산 |
당사 제품에 포함되지 않은 맞춤형 비디오 입출력 변환 솔루션의 경우, OEM/ODM 지원을 원하시면 문의해주세요. We can develop tailored products based on your requirements.
질문하기
응답해 주셔서 감사합니다. ✨