


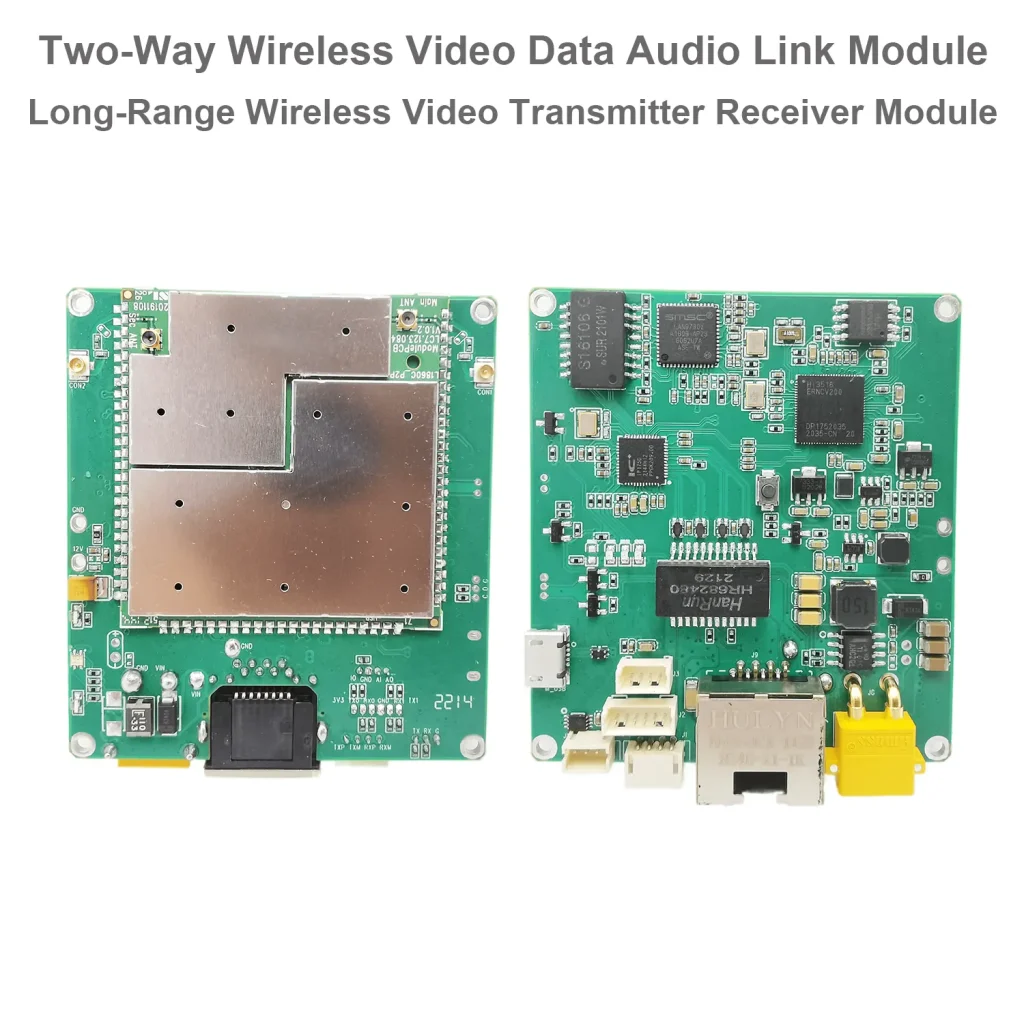
upgrade wireless video transmitter and receiver firmware
목차
Models for which the upgrade program applies

Upgrade Firmware Download
This v1.5.0 version of the firmware adds TCP server support to the D2 and D3 serial ports (configured through the webpage), and the customer can upgrade the webpage according to the prompts in the document.
메모: 업그레이드 후, the original parameters of the customer (such as IP address) remain unchanged. Download the upgrade wireless video transmitter and receiver firmware.
update_image_v1.4.3_fixup_2023.1.4
update_image_v1.5.0_2022.12.13
dlm_update_image_v2.5.2_2023.11.1
Upgrade Firmware Steps
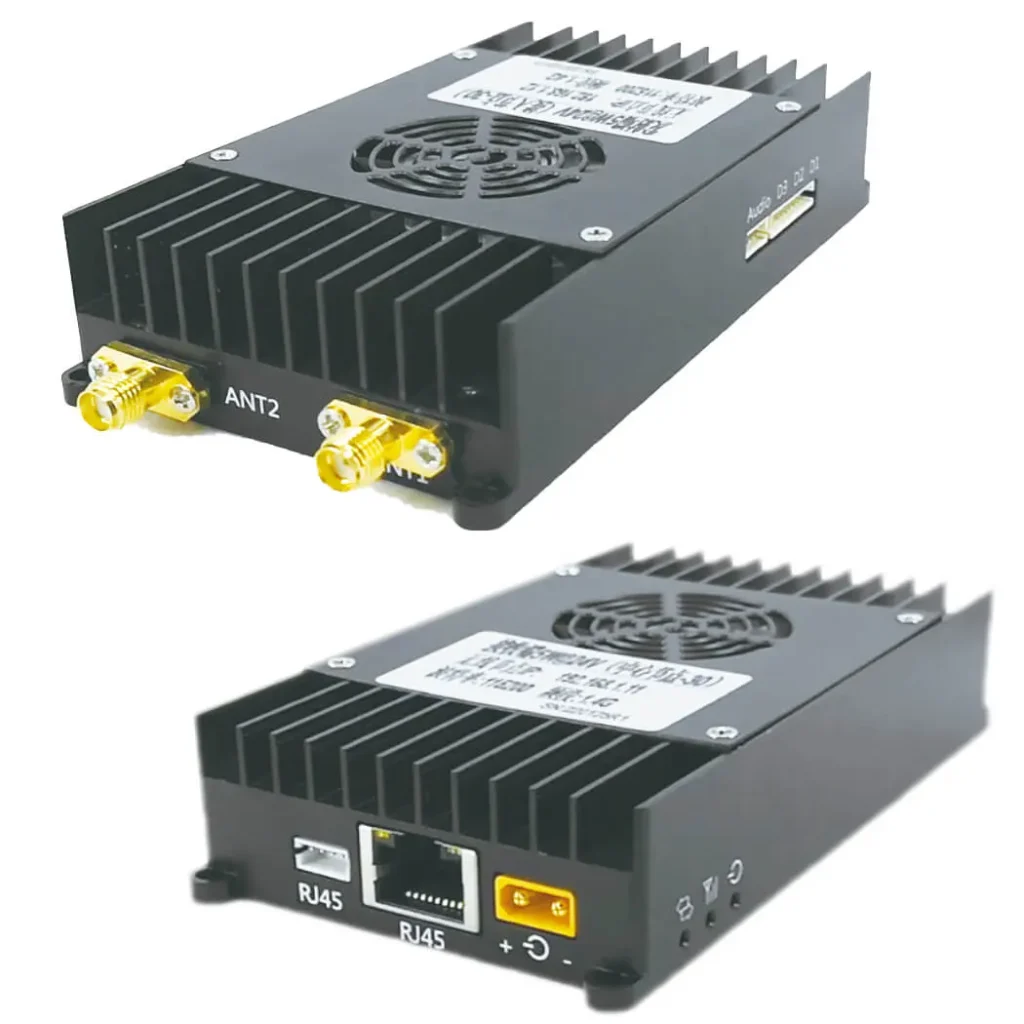
- Connect the transmitter or receiver to the computer through a network cable, 입력하다 192.168.1.11 in the browser of the computer (if you have not modified the default IP address), enter the Web server, and switch the system page.

- Click the button next to “Upload file”, and select the upgrade file (be careful not to unzip it).

- After selecting the file, click the Upload button to start uploading the upgrade firmware.

- A prompt box will pop up if the firmware is uploaded successfully. , and the size of the uploaded file is displayed.

- After confirming that the file size is correct, click the Upgrade button to start upgrading the firmware (be careful not to disconnect the power of the device after starting to upgrade the firmware).

- After the device is upgraded, there will be a prompt message and it will restart automatically.


What’s new in each version of upgrade wireless video transmitter and receiver firmware?
버전 1.1(2021.4.29)
- Modify the implementation logic of door-to-door transparent transmission (from the perspective of customers)
- Modify the default value of m_packet to 400
- Separation of sending/receiving ports for door-to-door transparent transmission
버전 1.2(2022.4.2)
- Add higher serial port baud rate support
- Added reboot support to the System page
- 3-color led marquee prompt at startup (convenient for production testing
- Make the CFG drop-in use the same as the module’s own drop-in
버전 1.3(2022.4.25)
- Add mesh support
버전 1.4(2022.8.23)
- Improve audio processing
- 2022.9.30 Disable the D3 serial port mode switching function
- 2022.10.20 Improve the mesh configuration
- 2022.11.24 Add AT^CONFIG command for internal hidden configuration
버전 1.5(2022.12.15)
- Added TCP server support for D2 and D3 serial ports
- 2022.12.30: Forbidden to configure web pages to Mesh mode
- 2023.1.4: Multi-cast prohibits spontaneous transmission.
- 2023.7.25: Improve fix power processing
- 2023.8.2: Add TCP server for parameter configuration
- 2023.9.7: Add IP read and write AT command processing to the TCP server
- 2023.9.13: Added customer setting switch and TDD uplink and downlink configuration
- 2023.9.26: Added backup IP (192.192.192.192), supporting Chinese and English switching
- 2023.10.19: Solve the annoying problem of browser caching web pages.
Do you have any questions about upgrading the wireless video transmitter and receiver firmware, 저희에게 연락주세요.
1. Can you upgrade to a lower version? Then upgrade again?
지원하다.
The actual operation is like this. In the current situation, the customer can only provide him with the production programming tool to restore to the production version (default version, not the latest version), and then upgrade the webpage to the latest version again.
2. Why I can’t access web UI anymore? but ping and serial debug commands are ok.
please try again, the IP start should be HTTP, not HTTPS. HTTP:192.168.1.12
3. What is the difference between the firmware version of 1.4.3 과 1.5?
둘 다 1.4.3 과 1.5.0 are the latest firmware. The difference is that 1.5.0 adds TCP server support to D2 and D3. 현재, 1.4.3 firmware is the most used for the default version. If customers require the TCP server for D2 and D3 functions, just need to burn version 1.5.0 펌웨어.
Now the default shipping configuration of the D3 serial port is used as a transparent serial port. How can I need to modify it for AT command interaction?
D3 직렬 포트의 기본 배송 구성은 투명 직렬 포트로 사용됩니다.. AT 명령 상호 작용을 위해 고객이 수정해야 하는 경우, the internal AT command can be sent under the webserver to modify the role of the D3 serial port. 구체적인 단계는 다음과 같습니다:
1. 웹 서버의 디버그 페이지에 로그인합니다.

2. 다음을 입력하세요. “AT^CONFIG=1,0,0” 에서 명령 “명령에 따라” column and the “좋아요” 성공하면 프롬프트가 반환됩니다.

3. 입력하다 “AT^구성?” 에서 명령 “명령에 따라” 구성이 성공했는지 다시 확인하는 열

메모:
- 위 수정 후, 효과를 적용하려면 전원을 다시 시작해야 합니다.
- D3를 다시 투명 직렬 포트로 수정해야 하는 경우, 위의 AT 명령을 다음으로 바꾸십시오. “AT^CONFIG=0,0,0”.
질문하기
응답해 주셔서 감사합니다. ✨