


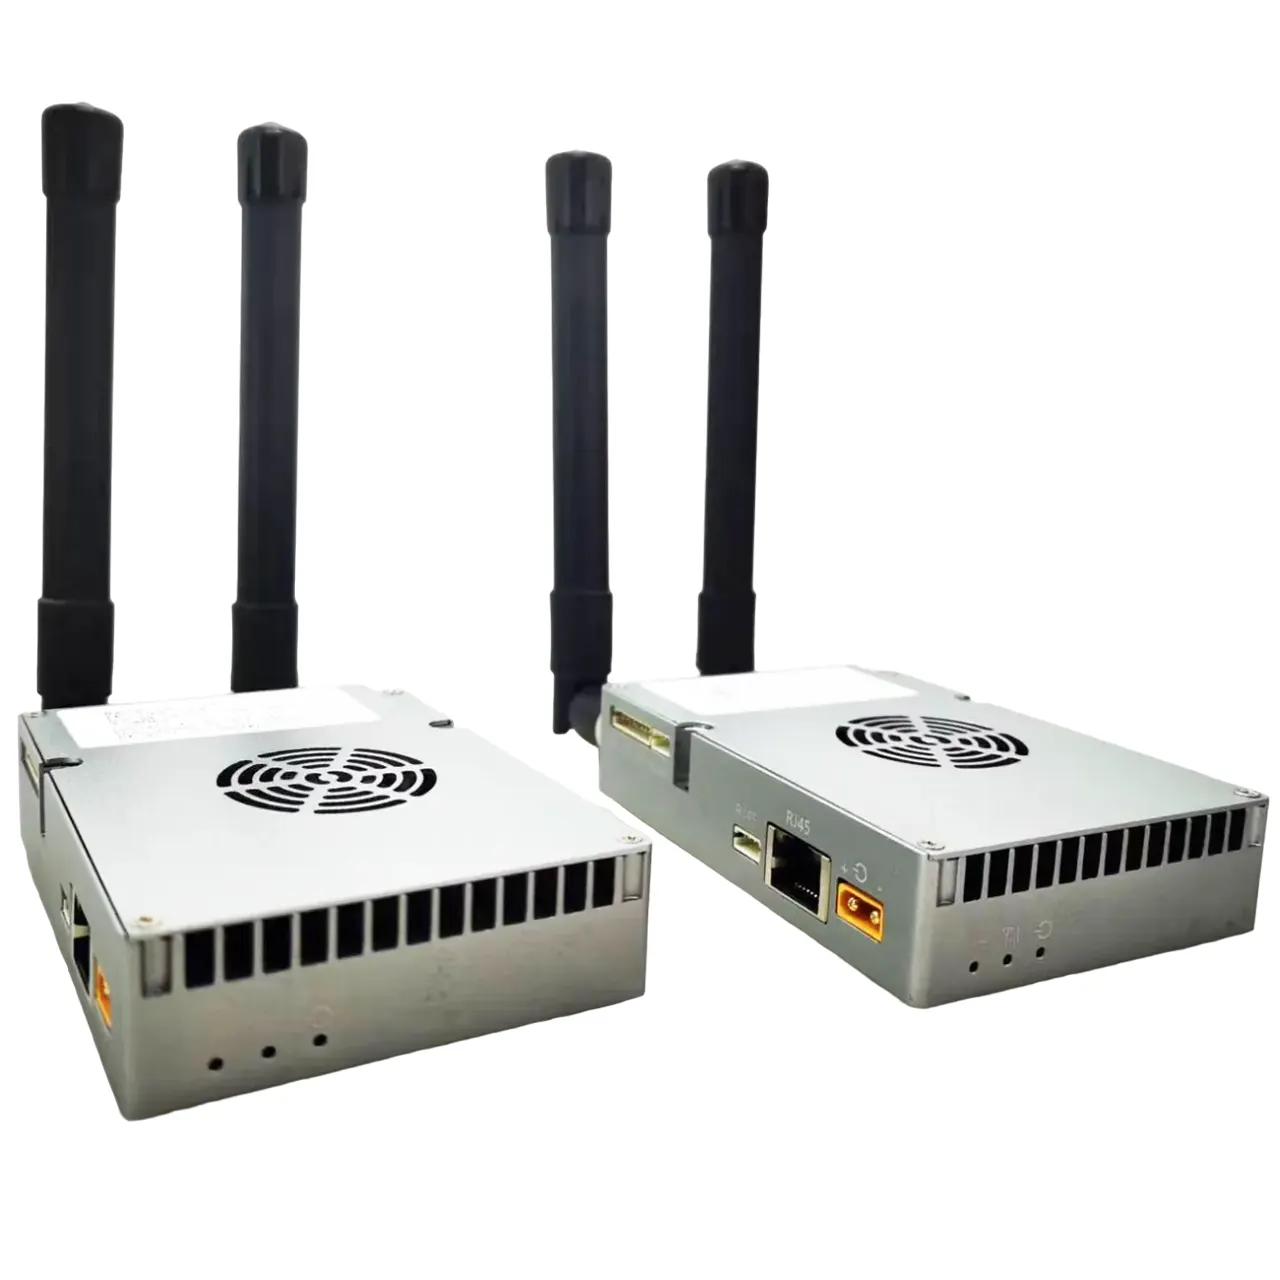


Certain customers prefer using Ethernet ports for data transmission instead of the TX900’s three data ports. This article provides instructions on how to do that.
This document applies to the models below, आदि.
-
 10W PA 150KM एयरबोर्न वीडियो डेटा लिंक लंबी दूरी की UAV वायरलेस ट्रांसमिशन ट्रांसमीटर रिसीवर ब्रॉडबैंड टैक्टिकल हैंडहोल्ड
 -
 22KM 55 किमी 80 किमी 100 किमी 150 किमी लंबी दूरी वायरलेस वीडियो ट्रांसमीटर रिसीवर ट्रांसमिशन ट्रांसमीवर ट्रांसीवर पीए 2W 5W 10W
 -
 दो-तरफा यूएवी वायरलेस वीडियो डेटा आरसी कंट्रोल लिंक मॉड्यूल लंबी दूरी की द्विदिश ट्रांसीवर ट्रांसमीटर-रिसीवर Vcan1681
The TX900 has three serial ports, two of which (D2 and D3) are used for wireless network access through IP addresses. The system includes a built-in serial port server allowing D2 and D3 ports to convert serial data over networks using TCP or UDP protocols. The D2 and D3 serial ports on the TX900 are identified by their port numbers.
Using the TCP protocol, the external device (संगणक) needs to create a TCP client, which can be used after connecting to the target TX900. The external device (संगणक) sends TCP data to the target TX900, which converts this data into serial port data and sends it out. The target TX900 will actively send this data to the TCP client upon receiving the serial port data.
Using the UDP protocol, external devices (कंप्यूटर) need to create a UDP service, and the local and remote port numbers of the UDP service need to correspond one-to-one with the “target port” तथा “श्रवण बंदरगाह” of the target TX900. The external device (संगणक) sends UDP data to the target TX900, which converts this data into serial port data and sends it out. When the target TX900 receives serial port data, it actively sends this data to the “target port” of the “target IP”, जहां “target IP” must be the IP address of the external device (संगणक).
TX900 configuration
ध्यान दें: Changing TX900 parameters in the web UI requires restarting TX900 to take effect.
उदाहरण 1: सीरियल पोर्ट 2 का TX900-Access Node (आईपी पता: 192.168.1.12) is required to communicate with the TCP ग्राहक of the computer (आईपी पता: 192.168.1.50) connected to the remote network port, as shown in the following figure.

In the web UI of TX900-Access Node (आईपी पता 192.168.1.12), set the network IP parameters:
स्थानीय आईपी: TX900-Access Node’s own IP address (उदाहरण के लिए:. 192.168.1.12)
Target IP: ऐच्छिक

In the web UI of TX900-Access Node, select Serial Port->Serial Port 2->Protocol Select “टीसीपी”, and then click “ठीक”.
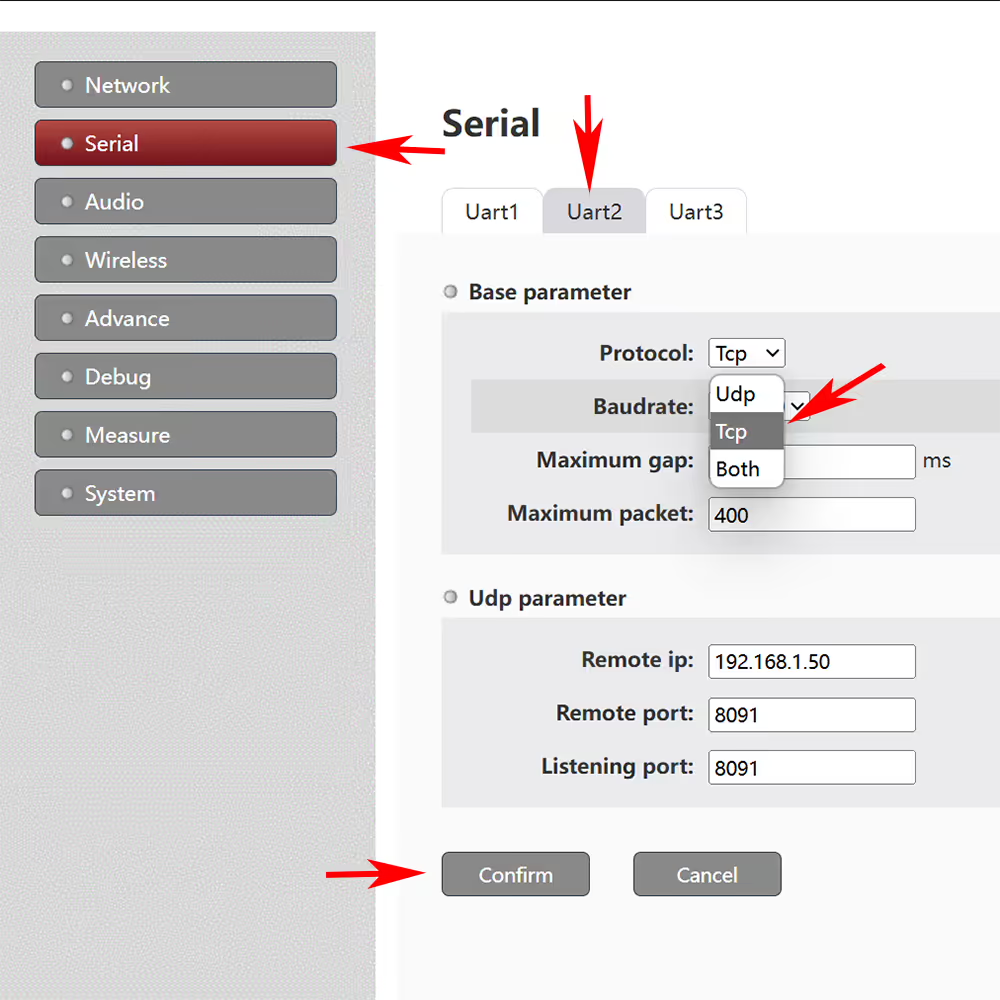
क्लिक करने के बाद “ठीक”, the interface will display:

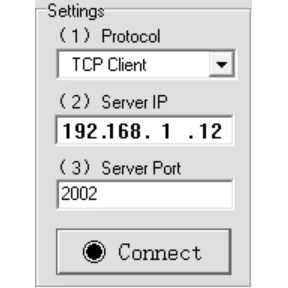
When creating a TCP client for a computer connected to a remote network (192.168.1.50), its remote IP address needs to be configured as the IP address of TX900-Access Node (192.168.1.12), and the port number needs to be configured as the TCP parameter “श्रवण बंदरगाह” (जैसे कि 2002) corresponding to the serial port of TX900-Access Node (such as serial port 2). Example of remote computer TCP client configuration:
उदाहरण 2: The computer (आईपी पता: 192.168.1.51) that requires सीरियल पोर्ट 3 का TX900-Access Node to connect to the remote network port उपयोग यूडीपी protocol for communication, as shown in the following figure.

In the web UI of TX900-Access Node, set the network IP parameters:
स्थानीय आईपी: TX900-Access Node’s own IP address (उदाहरण के लिए:. 192.168.1.12)
Target IP: The IP address of the computer connected to the remote network port (उदाहरण के लिए:. 192.168.1.51), which can also be left unconfigured. Configure the target IP address in the specific configuration of serial port 3 नीचे.
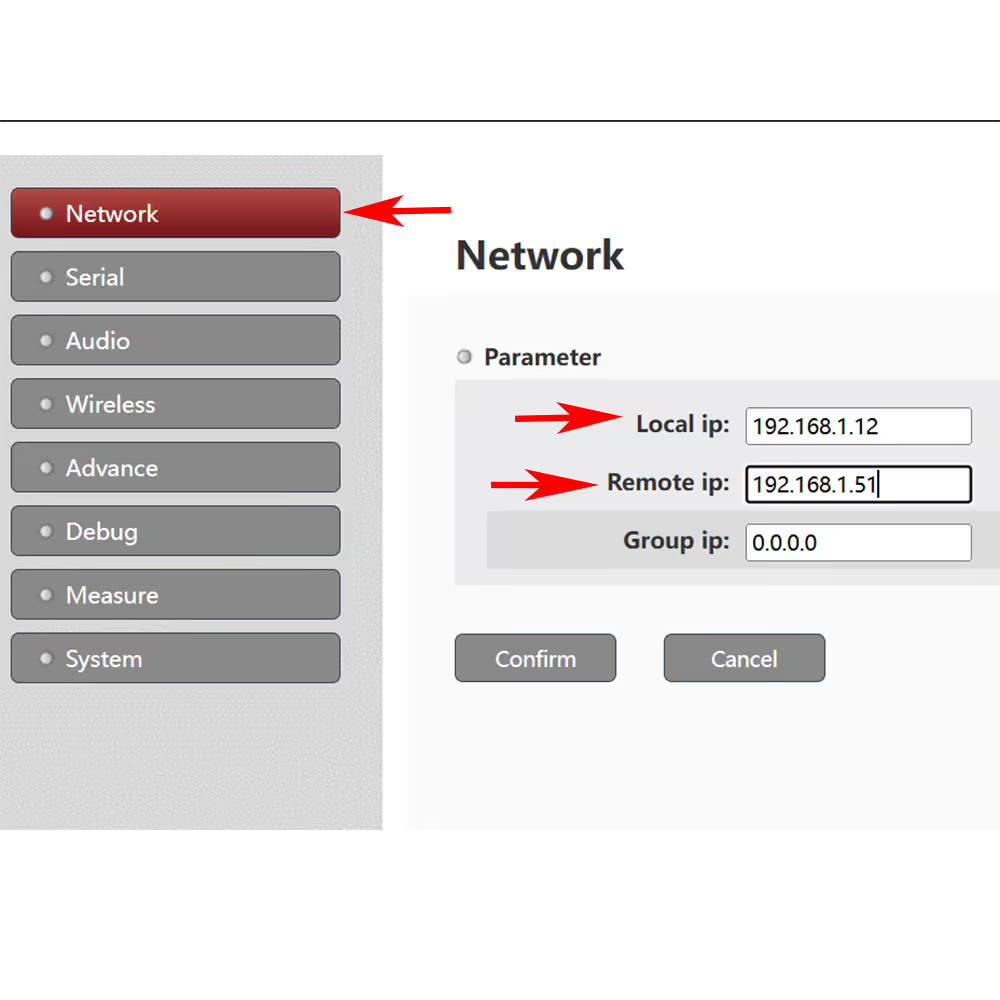
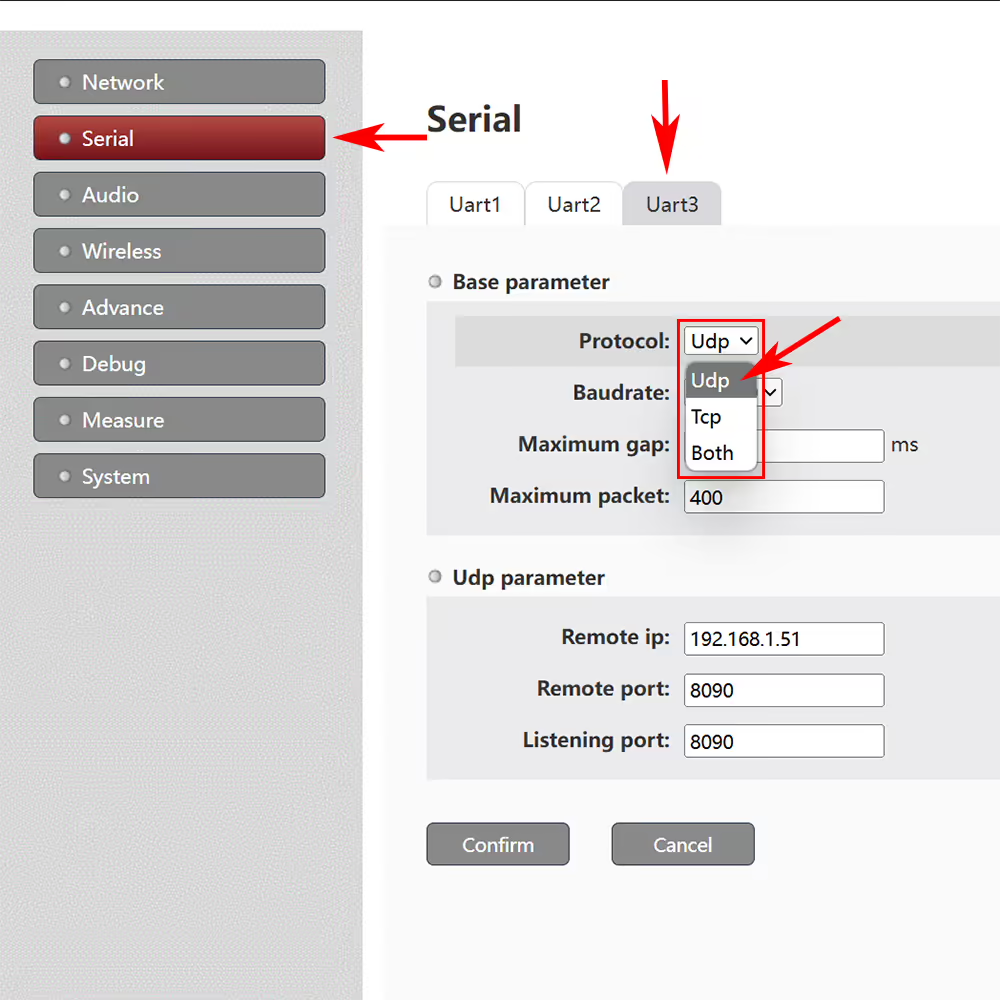
In the web UI of TX900-Access Node, select Serial Port->Serial Port 3->Protocol Select UDP, and then click OK.
क्लिक करने के बाद “ठीक”, the interface will display:
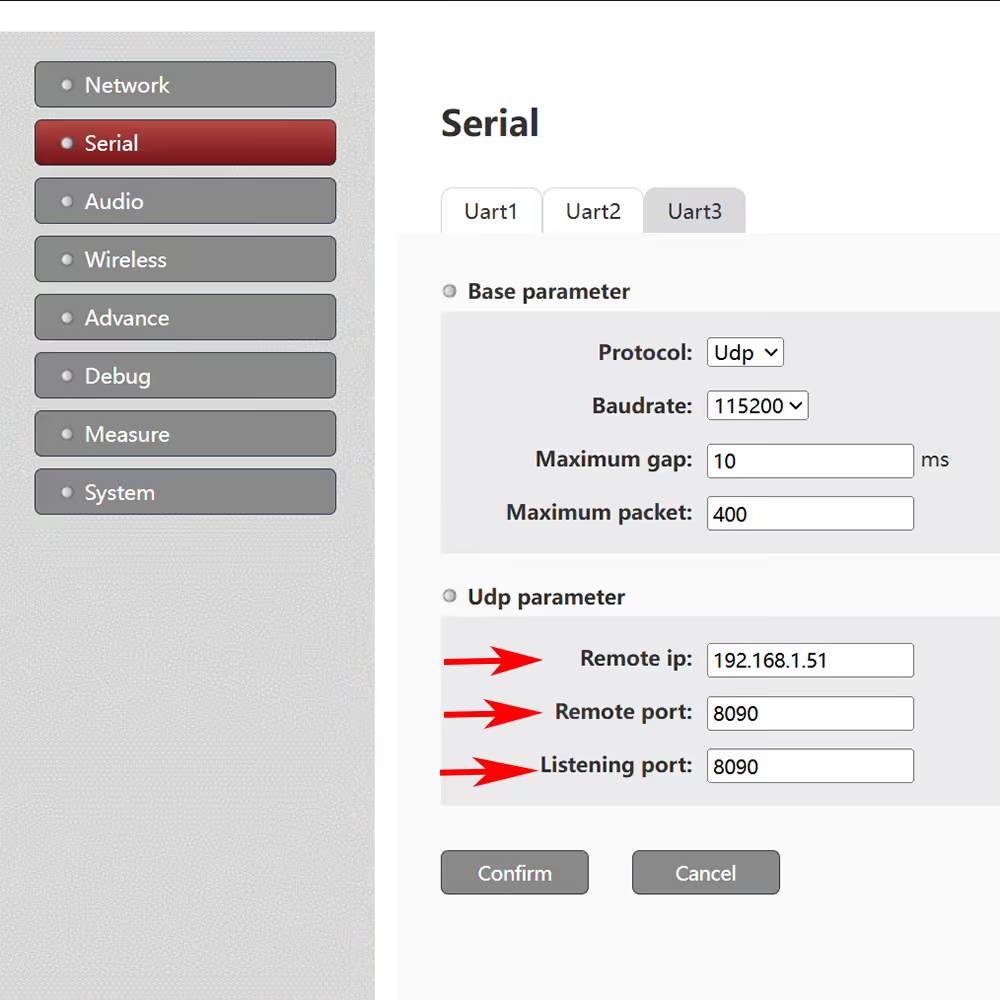
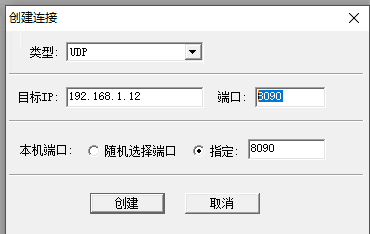
Fill in the IP address of the target computer in sequence (assuming 192.168.1.51), the target port is the UDP local port number of the target computer (assuming 8090), and the listening port is the UDP remote port number of the target computer (assuming 8090).
When creating a UDP client on the target computer (192.168.1.51), its target IP address needs to be configured as the IP address of Access Node (192.168.1.12), the remote port number needs to be configured as the listening port of Access Node (assuming 8090), and the local port number needs to be configured as the target port of Access Node (assuming 8090). As shown in the following example:
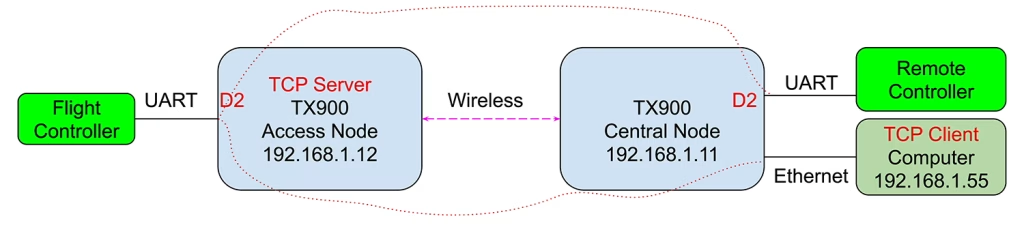
उदाहरण 3: A computer (आईपी पता: 192.168.1.55) that requires सीरियल पोर्ट 2 का TX900-Access Node to communicate with the remote network port via TCP ग्राहक, while also communicating साथ में सीरियल पोर्ट 2 का दूर TX900-Center Node, as shown in the following figure:
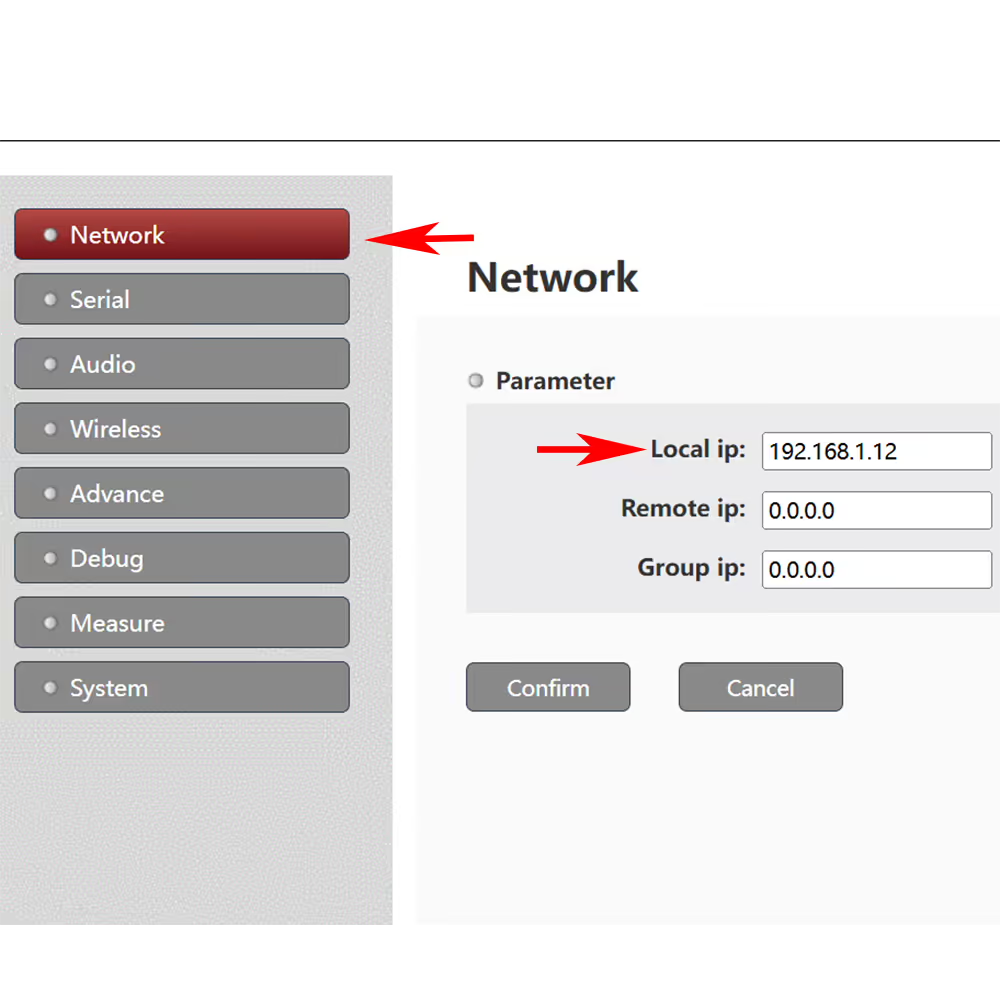
In the web UI of TX900-Access Node, set the network IP parameters:
स्थानीय आईपी: TX900-Access Node’s own IP address (उदाहरण के लिए:. 192.168.1.12)
Target IP: ऐच्छिक
In the web UI of TX900-Access Node, select Serial Port->Serial Port 2->Protocol Select “दोनों”, and then click “ठीक”.
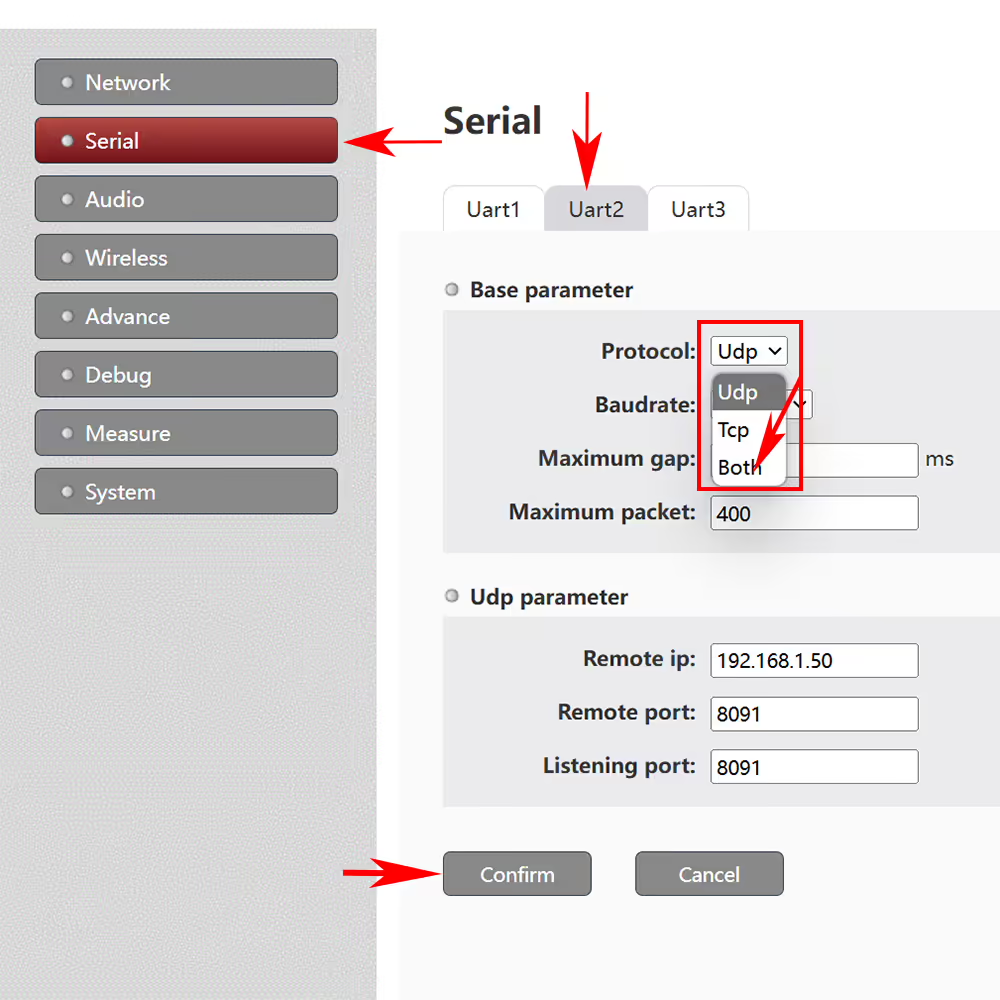
क्लिक करने के बाद “ठीक”, the interface will display:
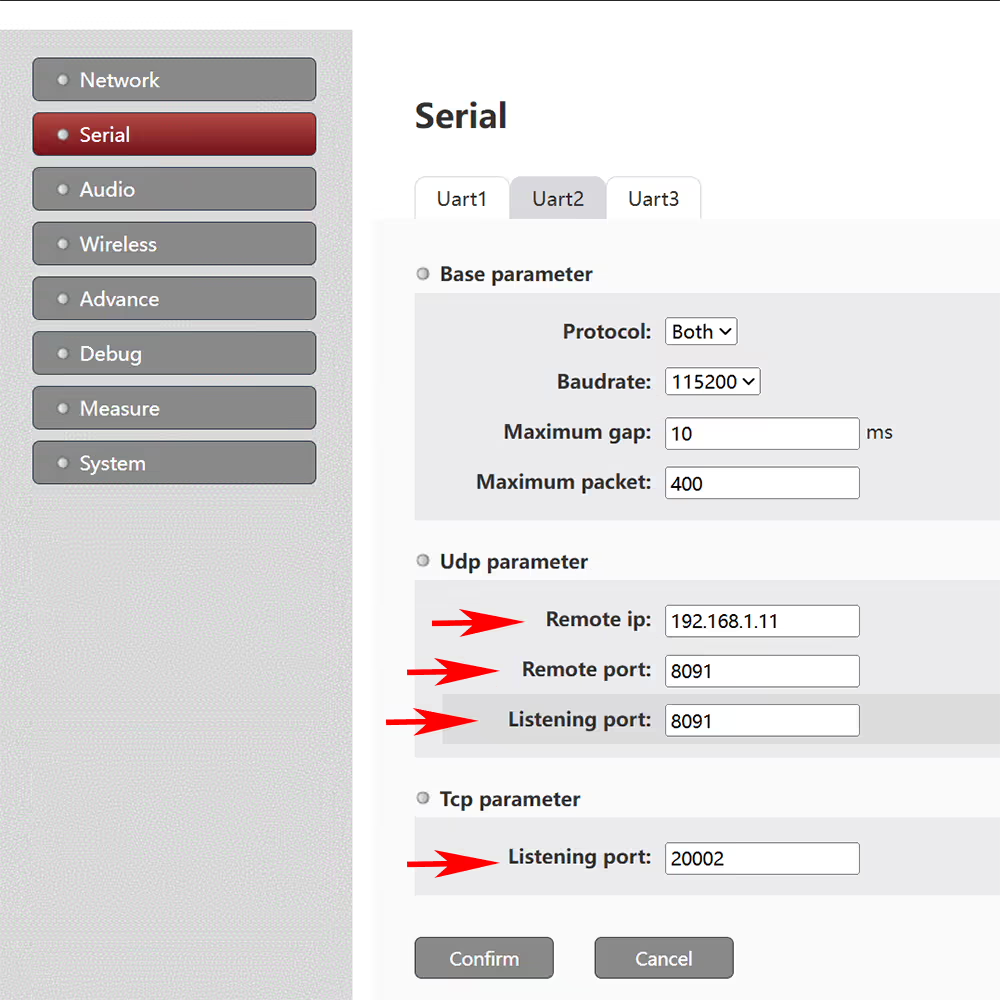
The target IP in the UDP parameters is set to the IP address 192.168.1.11 of the remote TX900-Central Node. The target port is set to be consistent with the D2 serial port listening port of the remote TX900-Central Node, and the listening port is set to be consistent with the D2 serial port target port of the remote TX900-Central Node.
The configuration of serial port 2 for remote TX900-Central Node (192.168.1.11) इस प्रकार है, corresponding to TX900-Access Node:
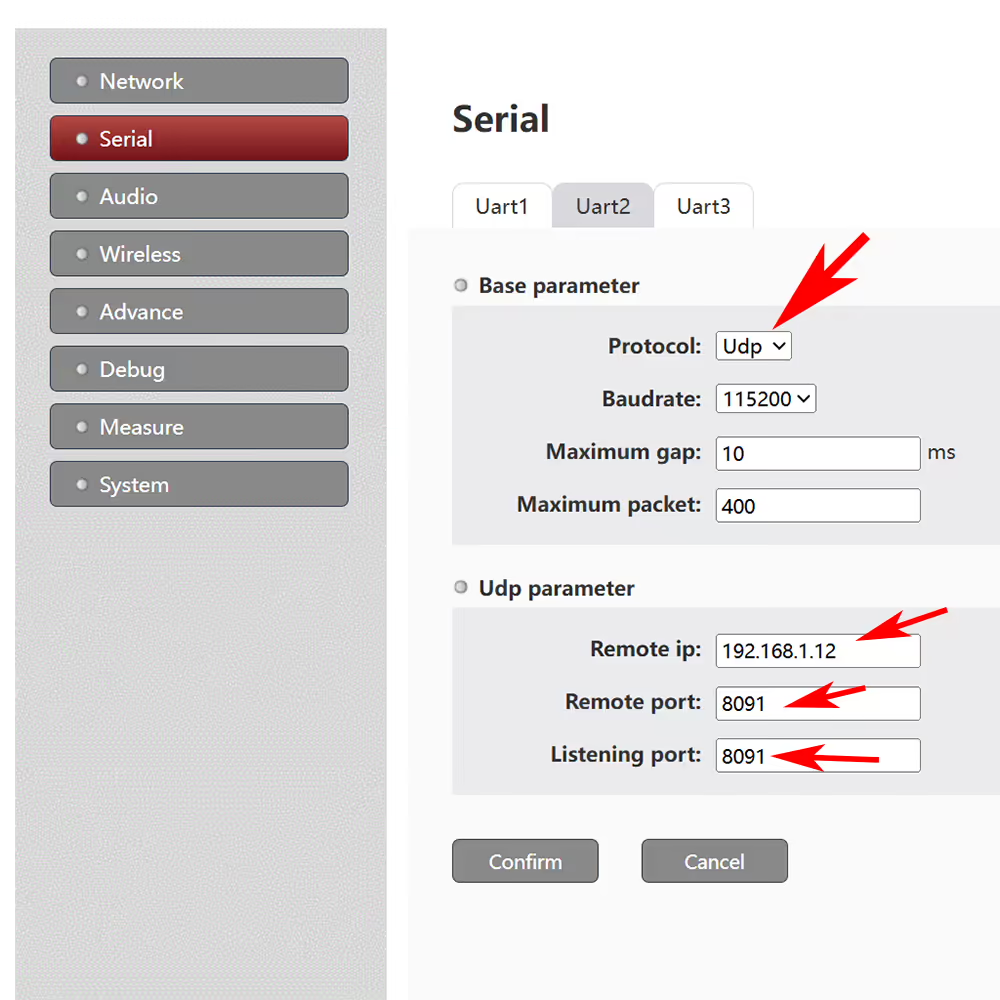
When creating a TCP client for a computer connected to a remote network (192.168.1.55), its remote IP address needs to be configured as the IP address of TX900-Access Node (192.168.1.12), and the port number needs to be configured as the TCP parameter “श्रवण बंदरगाह” (जैसे कि 2002) corresponding to the serial port of TX900-Access Node (such as serial port 2).
प्रश्न पूछें
आपका संदेश भेज दिया गया है