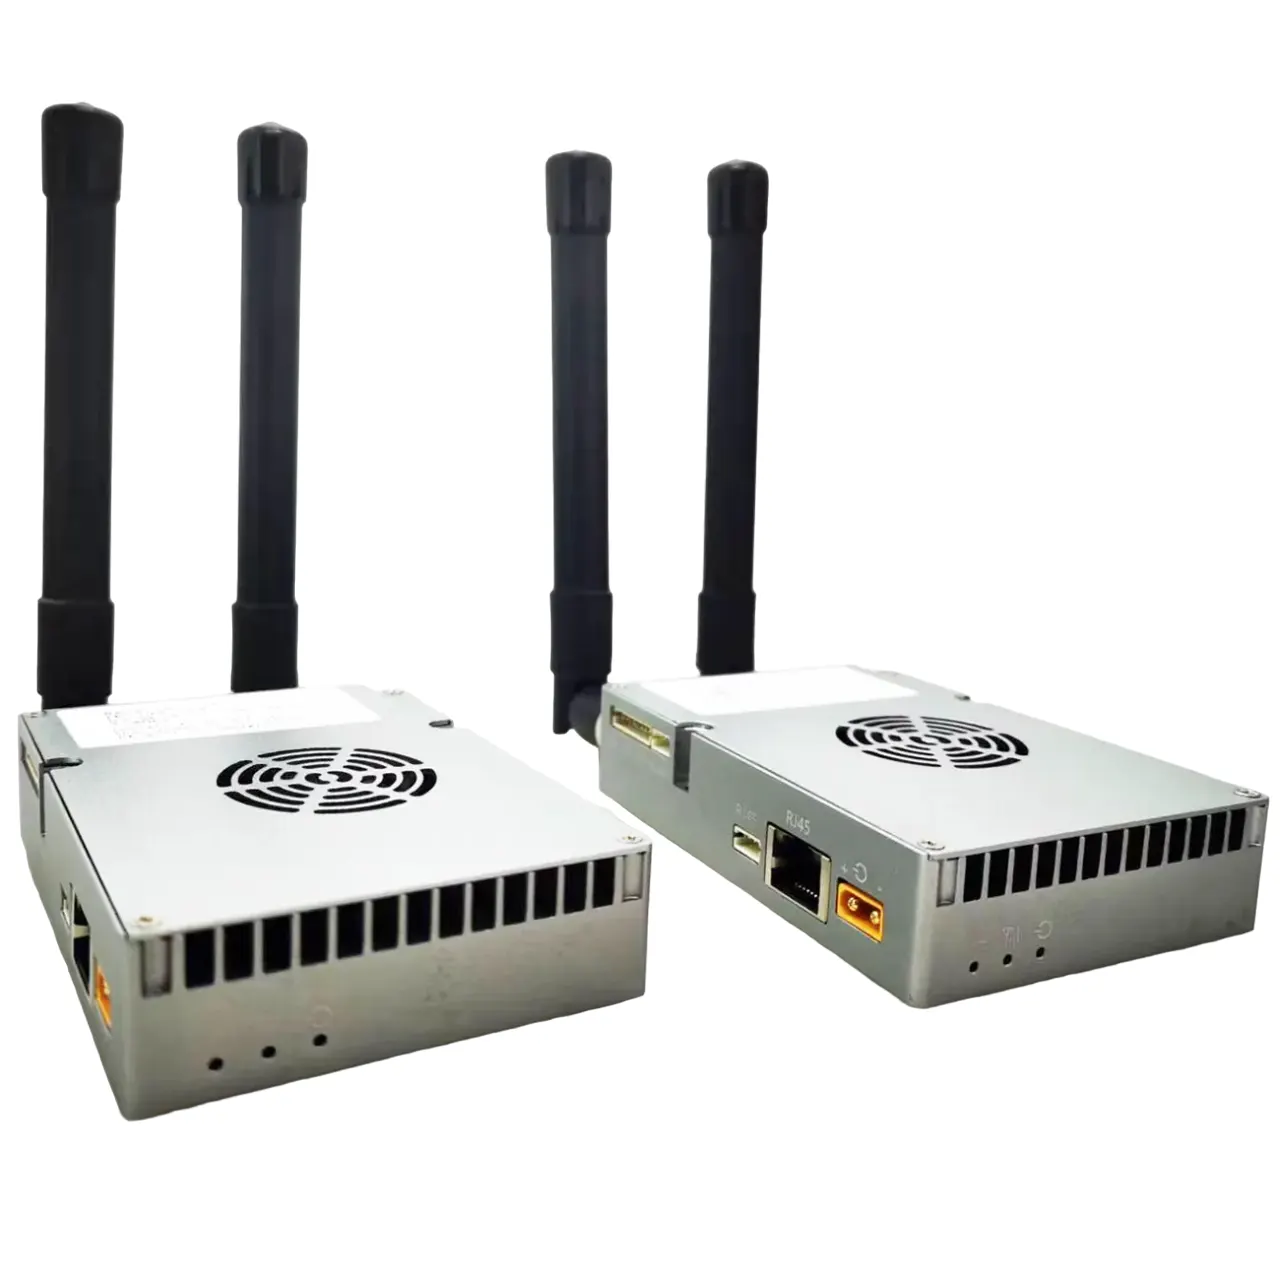

user manual for wireless video data transceiver TX900
Tusmada Tusmada
This user manual is suitable for the below models, TX900 and VCAN1681
-
 10W PA 150KM xogta fiidiyooga hawada laga qaado waxay ku xidhaa xidhidhiyaha gudbinta fiilo fog ee UAV-ga fog ee gacanta taatikada ah
 -
 15km 30km 80km 150km fogaan dheer oo fiidiyoow fidiyow ah gudbiyaha gudbinta gudbinta PA 2W 5W 10W
 -
 Labada-jid ee UAV Xogta Fiidiyowga Wireless-ka ah ee RC Control Link moduleka gudbinta-qaade-qaade-geeseedka fog-dheer Vcan1681
About TX900 / VCAN1681 Module
The main module inside TX900 is the VCAN1681 transceiver module, so the software configuration operation is the same as the VCAN1681 module. This manual is based on the Star wireless network, The Mesh wireless network is similar and is only a few different from the Star wireless network.
About hardware and I/O signal, please view the product description of TX900 and VCAN1681.
Codsiyada kala duwan, habaynta xuduudaha ee noode wireless (TX900 / VCAN1681, Waxaan isticmaali doonaa noode wireless si aan u muujino TX900 iyo VCAN1681 xagga hoose ee dukumeentigan) laga yaabaa in ka duwan. Caadiyan, Waxaan dejinay xuduudaha wireless-ka oo diyaar u ah in la maamulo iyadoo loo eegayo codsiyada macaamiisha ka hor intaan la keenin. Macaamiishu waxay u baahan yihiin inay fiiro gaar ah u yeeshaan goobaha interface-ka sida uart, maqal gudaha iyo dibaddaba, iwm.
Bitrates and Node Setting
Shabakadda wireless-ka xiddiguhu waxay ka kooban tahay hal nood dhexe iyo dhowr nambaro marineed(ugu badnaan 16). Dhammaan Nodes-yadu waxay ku jiraan shabakad wireless isku mid ah waxayna wadaagaan xajmiga gudbinta oo dhan (ugu badnaan 30Mbps @20Mhz). Marka masaafada qanjidhada wirelessku isu beddesho mid weyn, iyo signalka bilaa-waayuhu waa daciif, markaas wadarta guud ee bitrate-yada la wadaago ayaa yaraan doona. Xogta ka socota Noodka Dhexe ilaa marinka Helitaanka, Dekedda Anteenada Rx, and data from the Access Node to the Central Node, Dekedda Anteenada Rx. Uplink and downlink stream ratio can be set through the web UI/AT command.

When using two nodes for video and control data transmission, it’s better to have large bitrates from the video transmitter side to the video receiver side, and little bitrates from the control data transmitter side to the receiver side. For drone application, we set the ground side as the central node and the drone side as the access node, and we need to transmit video from the drone to the ground, then we set the uplink and downlink stream ratio as 1D4U, which means the bitrates from drone to ground is four times to the bitrates from the ground to the drone. This is the principle for setting the uplink and downlink stream ratio.
Shabakadda UI
Noodka bilaa-waayirka ah waxa lagu maamuli karaa Web UI. Ciwaanka hore ee IP-ga waxa lagu shaabadeeyey aaladda. Caadi ahaan waxaan dejineynaa cinwaanka IP-ga ee noode dhexe sida 192.168.1.11, iyo marinka gelitaanka waa 192.168.1.12 sida default. Iyo cinwaanada IP-ga ee noodyada kale ee gelitaanka waa 192.168.1.13, 192.168.1.14, ..., iwm.
URL-ka shabakada UI ee nood kasta oo wireless ah waa ciwaanka IP-ga, tusaale ahaan:
Markaad isticmaasho biraawsarkaaga si aad u booqato shabkada UI ee noodhka bilaa-waayirka ah, fadlan hubi in ciwaanka IP-ga ee kumbiyuutarka ku xidhan uu la mid yahay kan hoose ee ciwaanka IP-ga ee noodhka, tusaale ahaan, 192.168.1.xxx. Markaad dib u dejiso wax kasta oo cabbiraya shabkada UI, noodhka waa in dib loo kiciyaa si loo suurtageliyo isbeddelka.
Ciwaanka IP-ga ee qalabkaaga kale(IP camera, kombuyuutar, iwm.) labada dhinac ee qanjidhada wirelessku waxay noqon karaan isla subnet ka mid ah qanjidhada ama waxay noqon karaan subnet ka duwan qanjidhada.. When you want the Ethernet devices on two sides of the wireless nodes to communicate through the wireless nodes, then the IP address on the two sides themselves should be in the same subnet.
Set uart parameters
The wireless node has 3 parts: uart1(D1), uart2(D2), uart3(D3). In the wireless connection, the uart1 of the local node is paired with the uart1 of all other nodes in the same star wireless network. uart2 of local node is paired with uart2 of speicified remote node, uart3 works as uart2. The protocol of uart1 is in the link layer, and the protocol of uart2 and uart3 are in the TCP layer. When you meet a problem with your current software systems communication through uart1, then you can change to uart2 or uart3.
The set baud rate for uart1 to mate with the upper system:

Xiriirinta xogta iyada oo loo marayo uart1:

Deji xuduudaha uart2 iyo uart3 si aad ula mid noqoto nidaamka sare:

Xiriirinta xogta iyada oo loo marayo uart2(ama uart3) :
Xidhiidhka xogta uart2 iyo uart3 way ka duwan yihiin uart1 sababtoo ah borotokoolka uart2 iyo uart3 waxay ku jiraan lakabka TCP. Xogta uart2 Tx ee qanjirada maxalliga ah ayaa loo diri doonaa uart2 ee noodhka "Remote IP" ee cayiman.(ku dheji shabakada UI bogga Serial sida ka muuqata sawirka kore).
Marka ay leeyihiin dhowr noodes ee shabakada wireless, the uart2 Tx data of the local node can also be sent to uart2 of multicast nodes(set on the web UI Serial page as shown in the below picture).

Uart2 of other nodes who attend this Multicast 224.0.0.25 then will receive the uart2 data from it. Please view the below picture on how to set “attend Multicast 224.0.25” on the web UI of the Network page.
If the setting “Group IP” is 0.0.0.0, that means the node will not attend multicast, then this node will only receive uart2/uart3/audio data which was just sent to it. You can learn more about multicast by reading TCP/IP protocols technology documents too.

Uart3 works with the same principle of uart2 in data transmission mode.
To be noticed, Noodkayaga bilaa-waayirka ah wuxuu kaliya taageeraa ciwaanka Multicast IP ee baaxadda 224.0.0.23 ~ 224.0.0.255.
Marka "IP Remote" ee uart2 iyo uart3 iyo xogta maqalku waa isku mid IP node(ama Multicast IP), Markaa waxa kale oo aad si fudud ugu dhejin kartaa shabkada UI ee bogga Shabakadda sida hoos ku cad:

Set/View wireless parameters
Waxaan mar hore dejinay xuduudaha wireless-ka oo diyaar u ah inay ku shaqeeyaan si waafaqsan codsiyada macaamiisha ka hor intaan la keenin. Macaamiisha waxay ka arki karaan shabkada UI.


Frequency:
Maaddaama TX900 lagu dhex daray VCAN1681 modem-ka iyo moduleka korantada oo wadajira iyo cod-weyneeye korantada waxaa lagu qeexay codsiga macaamiisha, band soo noqnoqda lama bedeli karo.
bandwidth:
Marka xajmigu weynaado, xawaaraha wireless(qaniinyada) sare ayay noqon doontaa, dareenkuna wuu yaraan doonaa. Noodkayaga bilaa-waayirka ah waa is-qabsi ku saabsan ururrada iyo soo-saarka(qaniinyada) sidoo kale si toos ah ayaa loo beddelaa iyadoo lagu salaynayo SNR, marka waxaan soo jeedineynaa in la dejiyo xajmiyeedka sida 20MHz(ugu badnaan) si aad awood ugu yeelatid xawaaraha isgaarsiineed ee ugu weyn ee suurtogalka ah.
Tx Awood:
Tani waa in la dejiyo awoodda RF ee go'an ee VCAN1681 modem, baaxadda: [-40, 25] dBm. Awoodda RF ee TX900 waxay la mid tahay cabbirkan oo lagu daray faa'iidada cod-weyneyeeyaha. Markaa, waxaad arki kartaa in loo dhigay sidii 22 si ay u 25 halkan loogu talagalay TX900-2W node (24+11=35dBm, leexashada la xisaabiyay iyo khasaaraha channel, Awoodda RF ee ugu dambeysa waxay ku saabsan tahay 33dBm).
Addoon Max Tx Power:
Noolka dhexe wuxuu ku shaqayn doonaa awooda RF go'an (halbeegga la dhigay Tx Awood). Awoodda RF ee marinka gelitaanka ayaa noqon doona mid is-qabsi ah. Addoon Max Tx Power waa in la dejiyo awoodda ugu badan ee RF ee noodhka marka ay ku jirto is-qabsi. Iyo sidoo kale halbeeggani wuxuu kaliya u yahay modem VCAN1681 laftiisa. Awoodda RF ee TX900 waxay la mid tahay cabbirkan oo lagu daray faa'iidada cod-weyneyeeyaha.
View receiving status key parameters during node linking
Shabakadda UI 🡪 Debug 🡪guji "Start"
Halbeegyada waxaa lagu tusi doonaa sida sawirka hoose:
Kontoroolka noodhka:

Wararka ayaa kala ah:
[19:38:22]: waqtiga hadda ee kombiyuutarkaIP:12: maqaam ka helaya 192.168.1.12, qaybta afraad ee ciwaanka IP-ga ee noodhka xidhiidhka fog
ANT2 helista heerka anteenada 1
ANT1 helista heerka anteenada 2
RSSI: Qiimaha RSSI
RSRP: Qiimaha RSRP, ugu badnaan -44
Tx: maxalli ah VCAN1681 modem-waqtiga-dhabta ah ee awooda RF la kala qaado, mar kale maaha oo lagu daray faa'iidada amplifier awood
Snr: Qiimaha SNR ee waqtiga-dhabta ah
Distance: Fogaanta signalka bilaa-waayirka ah ee ka imanaya noodhka fog ilaa marinka deegaanka
Khalad_kiiba: ayaa sheegaysa boqolleyda khaladka ee wareegga
Cilad_guudba: ayaa sheegaysa wadarta boqolkiiba khaladka ka dib marka la geliyo gobolka xidhiidhka
Noodka gelitaanka:

Warbixinada qanjidhada gelitaanka ma laha "IP" sababtoo ah hal noode dhexe oo kaliya ee shabakada. The reports of the central node should have “IP” since it may have several access nodes connected.
When the access node is near to central node, the RF signal is very strong, then you can see “Tx” is “-9” dBm here, because the RF power of the access node is in self-adaption.
Measure UDP bandwidth during node linking
The VCAN1681 system has built-in iperf3 tools and customers can measure udp bandwidth with it conveniently during node linking.
About iperf3 tools, please view https://iperf.fr/.
To measure udp bandwidth from one node(tusaale ahaan 192.168.1.12, we say it node12 below) to another node(tusaale ahaan 192.168.1.11, we say node11 below), run iperf server on node11(Web UI 🡪 Measure 🡪 Iperf Server 🡪 click “Run Server”) marka hore, then run iperf3 client on node12(Web UI 🡪 Measure 🡪 Iperf Client 🡪set parameters 🡪 click “Run Client”).


Run AT Command via web UI


Customers can run AT Command to view/manage VCAN1681 modem parameters via web UI or uart3.
Web UI 🡪 Debug 🡪AT Command 🡪 Click “Send”
Run AT Command via uart3
Uart3(D3) of the wireless node is multiplexed as data uart and control uart. Normally uart3 works as data uart by default.
Web UI🡪 System page:

On the system page of the web UI, you can check the software version of your wireless node.
If the version number is larger than 1.4.1(including version 1.4.1), the uart3 of the wireless node works as data uart only(It’s not multiplexed as data uart and control uart).
If the version number is smaller than 1.4.1(not including version 1.4.1, tusaale ahaan, nooca 1.4), the uart3 of the wireless node is still multiplexed as data uart and control uart). For these versions, please follow the below description to switch uart3 to control mode.
Switch uart3 to control mode:
Tallaabada 1: Connect uart3 of the wireless node with the upper system’s uart

Please notice, if the wireless node is TTL uart, then the upper system should also be TTL uart. If the wireless node is RS232 uart, then the upper system should also be RS232 uart.
Uart setting of the upper system: heerka Baud 115200, 8 gelinno xogta, 1 stop bits, no parity checking, no handshaking, text mode.
Tallaabada 2: Send “+++<CR>” to the wireless node uart3
Start power on to the wireless node, the wireless node will complete system initialization in about 10 seconds. Then the node-LED in blue color will light up. After the node-LED lights up, the upper system sends “+++<CR>” to uart3 of the node(it should be operated in 1 daqiiqo, after 1 minute it will be invalid), and the node uart3 will feed back “Enter Config Mode!", it means now uart3 switch to control mode.
<CR> means carriage return.
When uart3 works in control mode, you can run the AT command via uart3. For every AT command sent to uart3, you should have “<CR>” at the end of the command.
Tusaale ahaan: AT^DRPS?<CR>
Switch uart3 back to data transmission mode:
When uart3 works in control mode, you can send “—<CR>” to uart3, then uart3 will feed back “Exit Config Mode!” to upper system uart. It means uart3 switches back to data transmission mode.
Typical examples of parameters setting via AT command
Tusaale 1: set the uplink and downlink stream ratio
For the star wireless network node, it should set the uplink and downlink stream ratio on the central node:
AT+CFUN=0 //stop the modem
AT^DSTC=3 //set as Config3 (1D4U)
AT+CFUN=1 //Startup the modem
Ogeysiis: the wireless node version more than 20km distance level only supports config0 (2D3U) and Config3 (1D4U); The wireless node version less than 20km distance level supports config0 (2D3U), config1 (3D2U), Config2 (4D1U) and Config3 (1D4U).
Tusaale 2: set the paired password
All of the nodes in the same wireless network should have the same password.
AT+CFUN=0
AT^DAPI=”AEF608AEF608AEF6″ //set the password as “AEF608AEF608AEF6”
AT+CFUN=1
Tusaale 3: two pairs of wireless nodes work in the same area
Central node of the first pair wireless node:
AT+CFUN=0
AT^DAOCNDI=04 //04 means 1.4GHz band
AT^DAPI=”11223344″ //set the password as “11223344”
AT^DRPS=,2,”25″ //2 means 5MHz bandwidth, “25” means Tx rf power
AT^ddtc=1 //set as central node
AT^DFHC=0 //dami boodboodka soo noqnoqda
AT^DLF=1,14304 // Quful inta jeer ee shaqada dhexe sida 1430.4MHz
AT^DSonsSF=2,1 //dami hurdada
AT^DSTC=3//deji isku xidhka kor iyo hoos
Waxay u baahan tahay inay dib u kiciso noodhka ka dib markay si guul leh u dejiso.
Gelitaanka noodhka ee lamaanaha hore ee noodhka bilaa-waayirka ah:
AT+CFUN=0
AT^DAOCNDI=04
AT^DAPI=”11223344″
AT^DSSMTP=”25″ //deji awoodda rf ee ugu badan ee marinka gelitaanka
AT^ddtc=2 // u dhig sida marinka gelitaanka
Waxay u baahan tahay inay dib u kiciso noodhka ka dib markay si guul leh u dejiso.
Udubka dhexe ee lammaanaha labaad ee noodhka wireless:
AT+CFUN=0
AT^DAOCNDI=04 //04 means 1.4GHz band
AT^DAPI=”678123″ //U dhig erayga sirta ah sida "678123"
AT^DRPS=,2,”25″ //2 means 5MHz bandwidth, “25” means Tx rf power
AT^ddtc=1 //set as central node
AT^DFHC=0 //dami boodboodka soo noqnoqda
AT^DLF=1, 14453 //Quful inta jeer ee shaqada dhexe sida 1445.3MHz
AT^DSonsSF=2,1 //dami hurdada
AT^DSTC=3//deji isku xidhka kor iyo hoos
Waxay u baahan tahay inay dib u kiciso noodhka ka dib markay si guul leh u dejiso.
Noodka gelitaanka ee labada lamaane ee noodhka wireless:
AT+CFUN=0
AT^DAOCNDI=04
AT^DAPI=”678123″
AT^DSSMTP=”25″ //deji awoodda RF ugu badan ee marinka gelitaanka
AT^ddtc=2 // u dhig sida marinka gelitaanka
Waxay u baahan tahay inay dib u kiciso noodhka ka dib markay si guul leh u dejiso.
Tusaale 4: burin qufulka inta jeer ee shaqada ee dhexe
AT+CFUN=0
AT^DLF=0 // burin qufulka inta jeer ee shaqada ee dhexe
AT^DRPS=,5, //5 means 20MHz bandwidth
Waxay u baahan tahay inay dib u kiciso noodhka ka dib markay si guul leh u dejiso.
Tusaale 5: set frequency band
AT+CFUN=0
AT^DSONSBR=65,8060,8259,66,14279,14478,64,24015,24814 //enable three band(800MHz/1400MHz/2400MHz)
AT^DAOCNDI=01 //set to work in 806~825.9MHz
Waxay u baahan tahay inay dib u kiciso noodhka ka dib markay si guul leh u dejiso.
AT+CFUN=0
AT^DSONSBR=65,8060,8259,66,14279,14478,64,24015,24814 //enable three band(800MHz/1400MHz/2400MHz)
AT^DAOCNDI=04 //set to work in 1427.9~1447.8MHz
Waxay u baahan tahay inay dib u kiciso noodhka ka dib markay si guul leh u dejiso.
AT+CFUN=0
AT^DSONSBR=65,8060,8259,66,14279,14478,64,24015,24814 //enable three band(800MHz/1400MHz/2400MHz)
AT^DAOCNDI=08 //set to work in 2401.5~2481.4MHz
Waxay u baahan tahay inay dib u kiciso noodhka ka dib markay si guul leh u dejiso.
AT+CFUN=0
AT^DSONSBR=65,8060,8259,66,14279,14478,64,24015,24814 //enable three band(800MHz/1400MHz/2400MHz)
AT^DAOCNDI=0D //set to work in 806~825.9MHz, 1427.9~1447.8MHz and 2401.5~2481.4MHz
Waxay u baahan tahay inay dib u kiciso noodhka ka dib markay si guul leh u dejiso.